All posts by RAverett

Satisfy Your Chocolate Craving With This Low-Carb Pie

Mile High Chocolate Pie image

I often use Cool Whip for a topper on desserts, so I’ve seen this recipe for this fudge brownie pie many times. I decided to try a low carb version of it. This pie is rich and sooo delicious! It tastes decadent. But it is a challenge for a low carb lifestyle.

First off, if you want to stay really low for dessert, you can’t eat even 1/10th of this pie without getting into the 15 net carb range. But 1/12th gets you close to the 10 net carb (11.9 NC) mark while using Cool Whip. If you make your own whipped cream, it lowers that carb expenditure down to 6.2 net carbs per slice. And the smaller piece is super rich and satisfying, so you have more pieces to enjoy.

My slightly revised recipe uses the sugar-free Instant Chocolate Pudding in the larger size that usually asks for 3 cups of milk, but you only use 2 cups. I also changed the bake time as my brownie came out a little too done. The recipe uses Cool Whip or heavy whipped cream, so note the changes for the whipped cream which are in italics.

Low Carb Mile High Fudge Brownie Pie

Based on the Cool Whip Mile High Fudge Brownie Pie recipe
Adapted by Rene Averett

For the Brownie
1 pkg (4 oz.) Baker’s unsweetened Chocolate
1/2 cup Butter
3/4 cup Sugar Substitute of choice
2 Eggs
1teaspoon Vanilla
1/2 cup Low Carb Flour

For the Filling
1 large pkg Sugar-free Chocolate Instant Pudding
2 cups Half and Half Cream
1 tub (8 oz) Whipped Topping or
(Substitute for whipped topping)
1 cup Heavy Whipping Cream
1/2 cup Sugar Substitute
1/2 teaspoon Vanilla Extract

Heat oven to 350 degrees F.

Melt chocolate and butter in a large microwaveable bowl on high for about 2 minutes or until butter is melted. Stir until the chocolate melts and combines with the butter. Add sugar substitute and stir. Add eggs and vanilla and mix until blended together. Stir in flour.

Spray a pie tin with baking spray and pour the chocolate mixture into it. Use a spoon or spatula to spread the batter evenly.

Bake 20 to 25 minutes. Use a toothpick inserted into the center of the brownie to check for doneness. If it comes out clean, the brownie is done. Cool completely. With a spoon, scoop out the brownie’s center, leaving a thin layer on the bottom and a 1/2″ thick rim around the edges. Put scooped out brownie aside and break into smaller pieces. Set 1/2 cup aside to use later. Do not snack on it. Okay, maybe one bite for quality control.

If you are making your whipped cream, make it now. Add the heavy cream to a chilled bowl and whip until frothy. Add sugar substitute and vanilla, then continue whipping until it is firm and peaks form when you lift the mixer beaters. Set aside for now.

Beat the pudding mix and half-and-half milk in a larger bowl with a mixer or a whisk for about two minutes. The pudding will begin to thicken. Stir in half the whipped topping or whipped cream and the reserved brownie pieces except for the 1/2 cup you set aside. Spoon the pudding mixture into the brownie crust. Top with the rest of the whipped topping or whipped cream. I put it around the edges rather than filling in the whole pie, which uses a little less of the whipped cream. Sprinkle the reserved brownie pieces over the top.

Refrigerate for at least two hours. If you refrigerate overnight or for several hours, it firms up more and is easier to lift from the pan.

Makes 12 servings.

Nutrition Information (Cool Whip) Calories 253 | Fat 20g | Cholesterol 90 mg | Sodium 279 mg | Potassium 133 mg | Carbohydrates 14 g | Fiber 2.1 g | Sugar 5.3 g | Net Carbs 11.9 g

Nutrition Information (Heavy Cream) Calories 282 | Fat 24g | Cholesterol 112 mg | Sodium 291 mg | Potassium 144 mg | Carbohydrates 8.8 g | Fiber 2.6 g | Sugar 1.6 g | Net Carbs 6.2 g

Cool off with Keto Key Lime Cheesecake Pie

Keto Key Lime Cheesecake Pie

Hi, everyone…

How is summer going for you? Too hot?? July was the hot month here in Northern Nevada, but August has been a little cooler. Still, a nice cool dessert recipe is always refreshing. This is a recipe I adapted from Sola Bread for their Keylime Cheesecake Bars. I didn’t use their Keto Granola but substituted an almond flour sugar cookie bottom crust. It’s easy to make and goes well with the cheesecake pie.

I admit, I never seem to get much flavor from any fruit zest, but chefs swear it carries more flavor than the juice. So I put it in. Add a teaspoon more lime juice if you don’t want to use it.

In other news, I am working on a new Asian Cookbook with recipes from China, India, and Thailand. I have a couple of Korean and Japanese recipes in there, also. I plan to have this released by the end of November, but it takes time to make and photograph all the recipes in the book, so fingers crossed I hit that deadline.

Keto Key Lime Cheesecake Pie

Recipe adapted from Sola Bread recipe
by Rene Averett

Crust
1 cup Almond Flour
2 tablespoons granulated Sugar Substitute
2 Tablespoons melted butter

Filling
4 Tbsp Hot water
1 Tbsp gelatin (1 packet)
16 oz cream cheese, softened
4 oz heavy cream
1/3 c sugar-free sweetener
3 Tbsp key lime juice
1 tsp lime zest

Garnish
Whipped topping
lime zest

Preheat oven to 350 degrees (F.) Spray an 8″ pie plate with baking spray.

In a bowl, mix almond flour with melted butter and 2 tablespoons granulated sugar substitute until it begins to pull together. Pour into pie pan and use fingers to press the crust into place on the bottom. Bake for about 10 minutes until the edges are lightly browned.

Add gelatin and hot water to a bowl, stir once and let sit for five minutes. Stir until the gelatin dissolves. If any chunks remain, remove them.

Add the cream cheese to a large bowl and blend until smooth. Add gelatin, cream, sugar substitute (you may use liquid sweetener if you like), lime juice, and zest. Mix until combined. Scrape down the sides as you go. Add one drop of blue and two drops of yellow food coloring to make a pale green mixture if you wish.

Pour the cheesecake mixture into the prepared pie pan and use a spatula to smooth it around evenly. Cover loosely with plastic wrap and refrigerate for 3 to 4 hours to allow it to set.

Cut into 8 slices and serve with whipped topping. Garnish with a little lime zest if you like.

Makes 8 servings.

nutrition information

Note: Nutrition information is based on the ingredients I used in this recipe and my measurements. They are a close calculation and may be slightly higher or lower. Ingredient substitutions may affect the carb count. Different brands may have other carb counts.

Breakfast or Brunch Strata

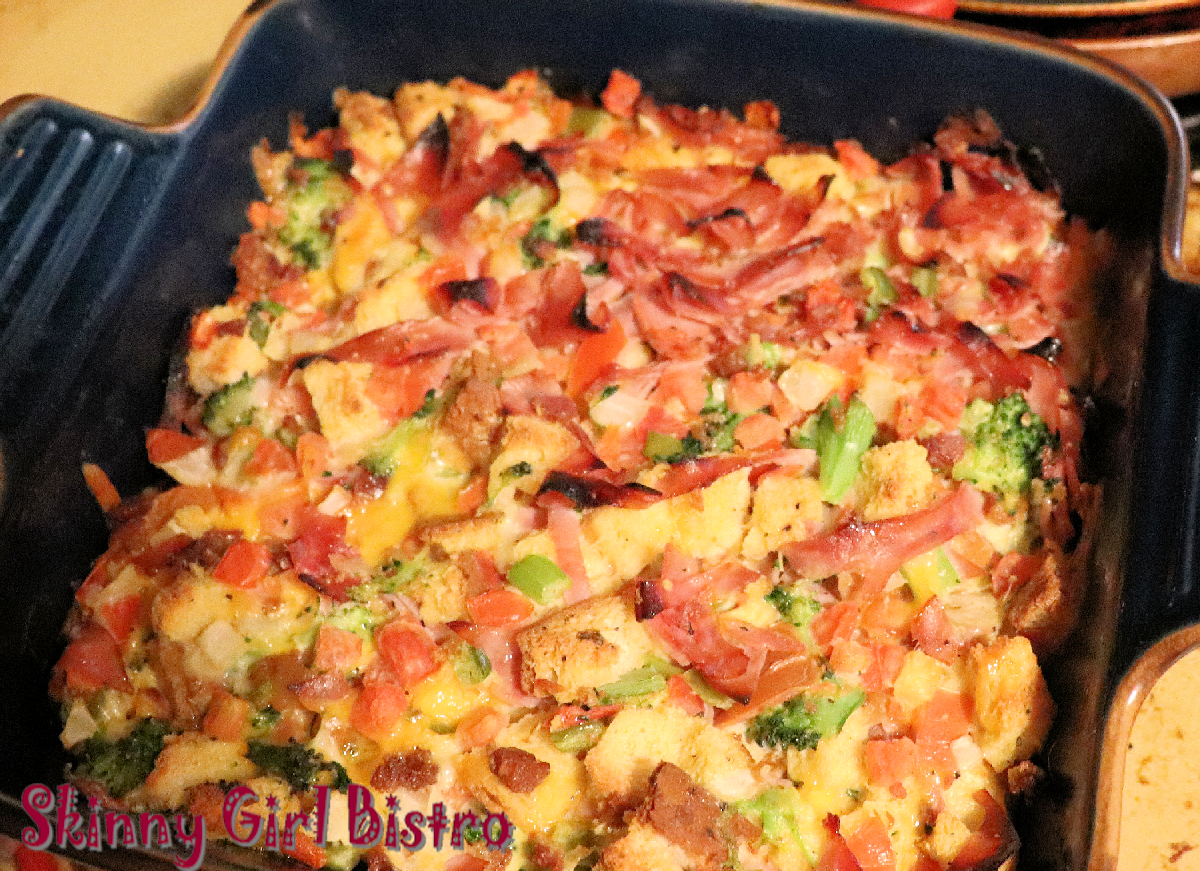
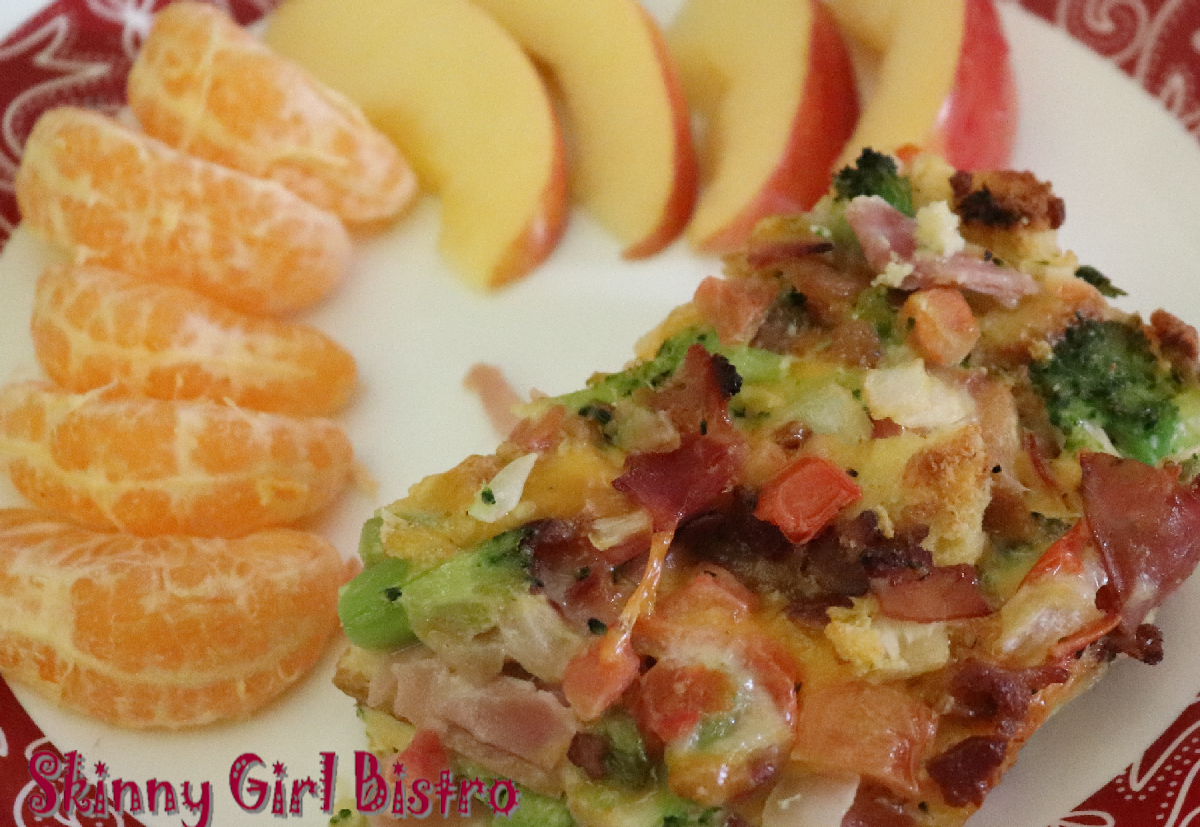
 I love stratas. I made my first one when I was a teenager and still living in El Paso, Texas. They’re a delightful combination of bread, eggs, meat, veggies, and spices that are baked to make a casserole. They’re not just for breakfast. They can make a hearty dinner as well. Of course, the problem with a low carb or Keto lifestyle is the bread. But it’s not an issue anymore. Several companies are now making Keto bread. In Reno, I can buy Orowheat Keto and Sola Bread at my local Wal-Mart store. Recently, Safeway resumed selling Inked Timber Wolf and Winter White bread, so I am a happy camper.

Not all Keto breads are created equal. Timber Wolf and Winter White are the lowest carbs I’ve found that actually taste like full-flour bread. And they are 1 net carb a slice.  Naturally, I used this bread for my strata and it came out excellently. If you can’t find them locally, you can order online, but beware the expensive charges on Amazon. Go to the company’s website to see if you can order direct. Still not as low priced as buying them from the market, but much lower than the prices on Amazon and Wal-Mart pages.

Ham and Broccoli Strata

1/2 cup Broccoli florets, broken into small pieces
3 slices Keto bread (1 net carb per slice)
1 cup Pico de Gallo *
1/4 teaspoon Garlic, minced
8 slices deli Honey Ham, shredded or diced ham
1/4 cup Bacon pieces
1/2 cup shredded Pepperjack Cheese or your favorite cheese
4 Eggs
¼ cup heavy Whipping Cream
Salt and ground Black Pepper to taste

Alternative to Pico,  make your own: Put 1 medium tomato diced, 1/4 cup onion, diced, and 1 small green pepper (Jalapeno optional), cut into small pieces. Add 1/4 teaspoon dried Basil, 1/4 teaspoon Garlic, minced, and 1/4 teaspoon Oregano. Stir together and let sit for about 15 minutes to allow the flavors to blend.

Preheat oven to 375 degrees F (190 degrees C). Grease a 9-inch square casserole dish.

Steam the broccoli over hot water or for about 1 minute in the microwave.

In a large bowl, add steamed broccoli, bread cubes, tomato or Pico, ham, and pepper jack cheese together and mix together.

Use a separate bowl to beat eggs, cream, salt, and pepper together. Pour the egg mixture into the broccoli mixture and stir to combine. Pour the mixture into the casserole dish and spread the filling evenly.

Bake 35 to 40 minutes until the eggs are set in the middle. Let rest about 5 minutes before cutting.

Makes 6 servings.

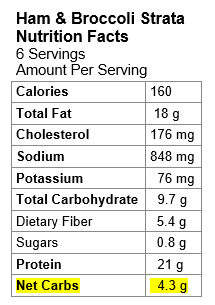
Note: If you don’t have a bread with 1 net carb per slice, add 0.5 carbs to each serving for each additional carb in the slice of bread. I used Inked Timber Wolfe bread, which is 1 net carb per slice. Other low carb or Keto breads may be 2 or even 3 carbs per slice, so adjust accordingly.

Note: Nutrition information is based on the ingredients I used in this recipe and my measurements. They are a close calculation and may be slightly higher or lower. Ingredient substitutions may affect the carb count. Different brands may have other carb counts.

It’s just around the corner…

Hola! That’s right Cinco de Mayo is coming!

Usually, I wait until the last minute to post a  new recipe, but I decide to get a bit ahead this month.  Mexican food is so full of spice and flavor that it’s hard to narrow down a favorite choice for celebrating. I’ll add a few links for previously posted dishes that could tempt you, or you can try the one I’m posting today.

Also, I’d like to remind you I have a Low Carb 15 Mexican Food recipe eBook that is currently on sale for just about any reader. It will be just 99 cents until May 6th.  It has 15 (actually 16) recipes to celebrate Mexican Food any time you want. Just ’cause you’re on a Keto or low carb diet doesn’t mean you can’t enjoy the wonderful flavors. In fact, with more and more products being developed for Keto, the choices are growing. I just picked up low carb tortillas from La Tortilla Factory that are zero carb! Don’t ask me how they do it; I am just thrilled to see it! And they taste pretty good.

Now on to the recipes. First up is a Chile Rellano Casserole. When you want something quick to make, this can come together in about 20 minutes with an addition 40 to 45 minute bake time. If you start with canned chiles, it’s really easy. And it is super low-carb. For the low carb flour, I used Dixie Carb Counters All Purpose Flour, but you can use Carbquik or even coconut flour (use 1/2 tablespoon).

Chile Rellano at the front.

Chile Rellano Casserole

2 (4 ounce) cans chopped green chiles or 6 to 7 whole Poblano or Anaheim chiles
8 ounces Mexican mix Cheese
1 large egg
1/2 cup Almond Milk or 1/4 cup Heavy Cream and 1/4 cup Water
1 tablespoons All-purpose Low carb Flour
4 oz Tomato Sauce or chopped Tomatoes, blended
1/2 cup Ricotta Cheese
1 tablespoon Flaked Onions, dehydrated or 1 quarter cup chopped Onion.
1 cup Diced Chicken (optional)
1/4 teaspoon Salt
1 tablespoon Herb and Garlic seasoning

Preheat the oven to 350 degrees F (175 degrees C). Grease an 8×8-inch baking dish with cooking spray or butter.

If using chopped chiles:
In a large bowl, add eggs, milk, and flour and whisk together. Then add chiles, ricotta cheese, seasoning, and flaked onions. Whisk together until blended. Add chiles, chicken, and 1/2 of the cheese and stir to mix.

Pour the mixture into the baking dish and spread evenly. Sprinkle cheese on top.

If using whole chiles:
If you’re using canned whole chiles, go to the next step. If you’re cleaning fresh chiles, place about six chiles under the broiler and cook until they are charred. Flip them over to get both sides. Place in cold water to loosen the charred skin. Use a paring knife to get the skin loosened and remove it. Cut the stems off, then slice open and remove the seeds and any membrane (ridges) inside unless you want them very spicy.

Lay half the chiles in the baking pan’s bottom, sprinkle 1/4 of the cheese over the top, then lay the other half on top and sprinkle with more cheese.

In a large bowl, add eggs, milk, and flour and whisk together. Then add ricotta cheese, seasonings, and flaked or chopped onions. Whisk together until blended. Add chiles, chicken and 1/4 of the cheese and stir to mix. Pour over the chiles.

Bake in the preheated oven for 25 to 30 minutes until it is set. Pour tomato sauce evenly over the top; continue baking for 15 more minutes.

Turn broiler on. Sprinkle top with remaining cheese. Place under the broiler until cheese is melted, 2 to 3 minutes.

Let cool about 5 minutes before serving. Serves 4.

Casserole Nutrition Information

Since you save so many carbs with the main course, you have enough for a tasty side dish. This Spanish rice is made with riced Natural Heaven Hearts of Palm . You can also use the canned riced hearts of palm. Failing that, I do have a cauliflower rice version here.  This is a low carb variation on my grandmother’s recipe, so it’s more Tex-Mex than Mexico, but I love it.

I’ll just mention that Natural Heaven sells a pre-made Southwest Rice with beans and corn.  It’s okay, although a little higher in carbs.  I tried it and I think it has a vinegar taste to it, but if you’d like to try it, you can order it from Amazon.

Hearts of Palm Spanish Rice

Palm Spanish Rice

1 package Natural Heaven Hearts of Palm White Rice
OR 1 can Hearts of Palm Rice
1 8 oz. can Diced Tomatoes with Chile
1/4 cup Diced Onions
1 tablespoon Butter
1 teaspoon Garlic, minced
1 teaspoon Mrs. Dash Spicy Seasoning
1/4 teaspoon Salt
1/2 teaspoon Cayenne Pepper (optional)

In a skillet, add the butter. When melted, add the garlic then stir until it is sizzling. Add the chopped onion and stir for about three minutes until it is fragrant. Add the rice and stir it in for about three minutes.

Add the can of diced tomatoes and chiles and mix it into the skillet until the rice is coated. Add the seasonings and stir. Reduce the heat to a medium simmer and let cook for about 5 minutes.

Makes 4 to 6 servings. The nutrition information is for 4 servings. Six servings are 5.1 net carbs each.

Palm rice Nutrition Information

Other Mexican food recipes you might enjoy are:


Carnitas    

Enchilladas with Chicken and Zucchini

Photo: Cod with Chorizo

Spicy Cod with Chorizo

Easy Flan

Note: Nutrition information is based on the ingredients I used in this recipe and my measurements. They are a close calculation and may be slightly higher or lower. Ingredient substitutions may affect the carb count. Different brands may have other carb counts.

Copyright 2023 by Rene Averett

Celebrate St. Pat’s with a Boozy Cake!

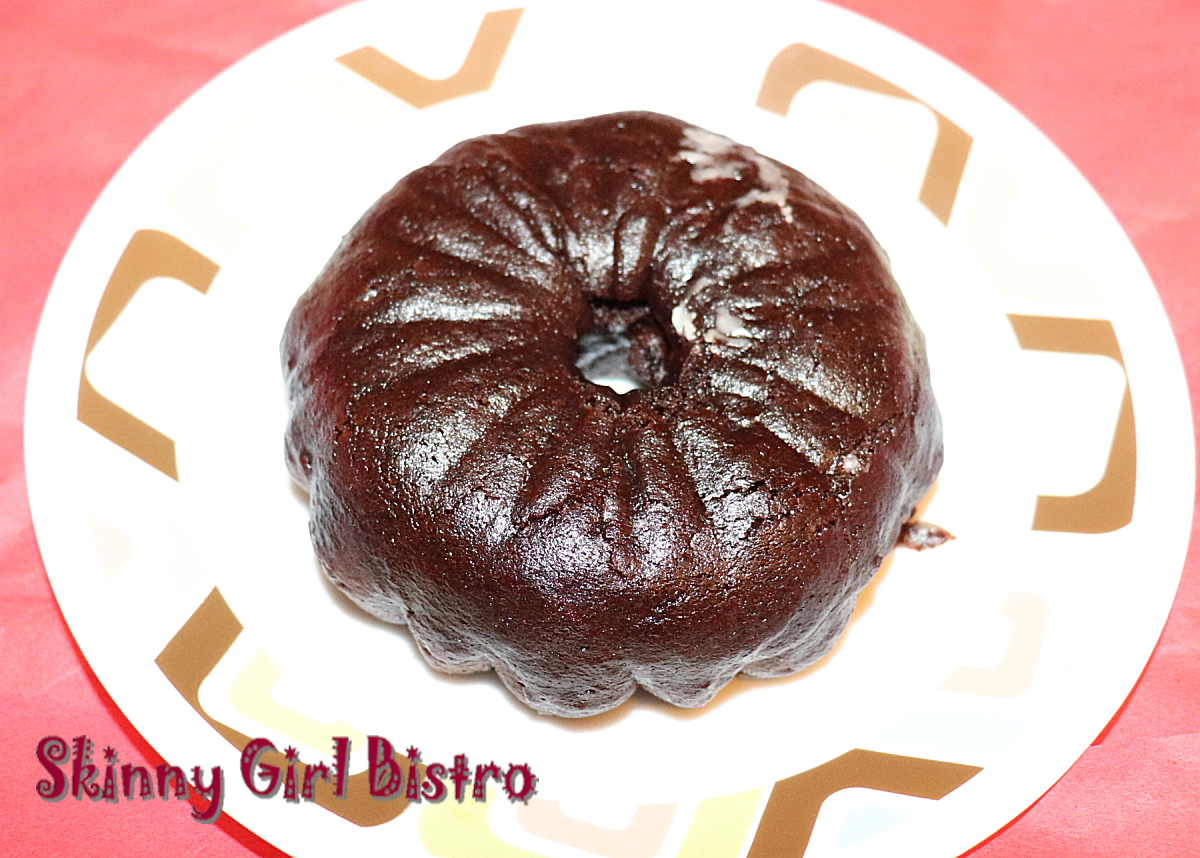
Irish Whiskey Bundt Cake photo

As promised, I am back with a recipe to make a mini-Bundt Irish Whiskey cake.  I am having so much fun making and eating  mini treats. These little cakes have just enough Irish whiskey in them to let you know it’s there, but they won’t overwhelm your taste buds.

While the recipe is aimed at using a mini Bundt cake maker like my DASH, they can be baked in a mini-Bundt pan in the oven, or you can increase the ingredients to make a full-sized Bundt cake.

Irish Whiskey Mini Bundt Cake

1 cup Carbquik or other low carb baking mix*
1/4 cup Almond Flour
1/4 teaspoon Baking Soda
1/2 cup softened Butter
1/2 cup Swerve Brown Sugar
1/2 cup granulated Sugar Substitute
1 package Sugar-free Vanilla Pudding
2 large Eggs
2 tablespoons Irish Whiskey
1 teaspoons Vanilla Extract
1/4 cup Whipping Cream or Unsweetened Almond Milk

* Alternative for a low carb baking mix or low carb flour is coconut flour (1/2 cup plus add an extra egg and/or other liquid). Other nut flours might work, but I have yet to try them.

Whiskey Syrup
1/4 cup water
2 T Sugar Sub
1 T Irish Whiskey

For the Icing
4 oz. Cream Cheese
1/2 cup Swerve Confectioners Sugar
3 tablespoon Cream
4 tablespoon Irish Cream Liqueur

Preheat your mini Bundt pan and lightly brush with oil or baking spray.

In a mixing bowl, add the flour, baking soda, and pudding mix. Whisk to combine and set this aside.

In a large bowl, add 1/2 cup softened butter. Mix until creamy.

To the butter, add the granulated sugar and dark brown sugar. Continue mixing for 2 more minutes. This should be fluffy-like.

Add each egg, mixing well after each one, and add the milk. Add the vanilla with the last egg.

Next, add the dry ingredients in three batches. Stop mixing once it is incorporated.

Spoon 1/4 cup batter into the mini Bundt maker. Spread the cake evenly, close the lid, and bake for 8 minutes. Let Cool.

If you’re baking in an oven, grease and flour the Bundt molds and divide the batter evenly into them. (My pan makes four cakes, so they will be higher in carbs if you make four.) Bake in a 350-degree oven for about 30 minutes. Use a toothpick to check doneness; a clean or almost clean toothpick means they are done.

If you’re making an entire Bundt cake, double the recipe, grease and flour the Bundt mold, and pour in the batter, distributing it evenly. Thump the pan a few times on the counter to get any air bubbles out. Bake in a 350-degree oven for about 50 minutes. Check for doneness with a toothpick.

For more moisture, brush with whiskey syrup before icing.

Whiskey Syrup

In a small saucepan, add 1/4 cup water, whiskey, and sugar substitute and stir. Bring to a boil, reduce heat to a simmer, and cook until the mixture thickens to a syrup consistency.

Poke a few holes in the cakes, then brush the syrup over the top. It will go into the cake, adding more moisture and flavor.

Ice the Cakes

To make the icing, beat softened cream cheese in a bowl. Add Swerve Confectioner’s Sugar, whipping cream, and Irish Cream liquor. Alternatively, you can use 2 tablespoons of whiskey instead of the Irish Cream or add sugar-free Irish Cream Syrup. Beat until the ingredients are combined, and the icing thickens to a spreading consistency. If it is too moist, add additional confectioner’s sugar until it is easily spread. Use a knife to ice the cakes.

If you’d prefer a glaze to the icing, use less sugar and mix until it is syrupy. Spoon over each cake and let it run down the sides.

Nutrition information shows the carb counts for a 1/2-cake serving with Irish Cream Liquor and with either whiskey or a sugar-free Irish Cream syrup.

Cake only Nutrition Info

Nutrition with topping

Note: Nutrition information is based on the ingredients I used in this recipe and my measurements. They are a close calculation and may be slightly higher or lower. Ingredient substitutions may affect the carb count. Different brands of flour have other carb counts.

Looking for other St. Patrick’s Day recipes? Try one of these.

Irish Cream Ricotta Cheesecake Tops St. Patrick’s Day

Irish Apple Cake Made Low Carb

A Bit of Luck with an Irish Benedict Brunch

LC Irish Soda Bread