Category Archives: Vegetarian

Creating a pizza like take and bake

All during the Olympics, I kept seeing an advertisement for a take and bake pizza with chicken, bacon, and artichoke hearts.  Man, did my taste buds scream for a piece of that.  Instead of giving in to the urge to buy a high carb pizza, I made a low carb one instead.  In fact, I made it two ways that are very similar, but both are filled with more meat and vegetables than the take and bake version.  Here’s how I made mine.

For the crust, I used LC Foods low carb pizza crust that you can purchase pre-made or buy the pizza flour mix and make your own.  You can also use a cauliflower pizza crust, a chicken pizza crust, or this flax meal flat bread crust.  I wouldn’t recommend the chicken crust since you’re putting chicken on top, but it would still work.

Pre-cook the crust as described in the previous links so it is partially cooked.

Made with zucchini and asparagus added.

Chicken, Bacon, Artichoke, Zucchini and Asparagus Pizza

For the toppings:
1 cup cooked Chicken Breast or Thighs, chopped or shredded
1/2 cup Artichoke Hearts, cut into bite-sized pieces
4 slices of thick-sliced Bacon, cooked and broken into pieces
1/2 cup Alfredo Sauce, such as Barilla (look for lowest carb one)
1 Zucchini, thinkly sliced
4 spears Aspargus, medium spears, cut into 1/2 inch pieces
Crushed Red Chile Peppers, dried (optional)
1 cup Mozzarella Cheese
Parmesan Cheese to taste

Preheat oven to 450 degrees (F.)

Put pizza crust on a pizza stone or pan, then spread with the Alfredo sauce, taking it as close to the edge as possible. Put the zucchini slices on top of the sauce, placing them evenly around the pizza. Distribute the chicken next, then the artichoke hearts, followed by the asparagus pieces. Sprinkle the crushed red peppers on, if you wish, then cover the top with mozzarella cheese. Sprinkle on a little Parmesan cheese now or add it after the pizza comes out of the oven.

Bake for about 20 minutes until the cheese is melted and lightly browned. I kind of like my cheese a little more crusty, so I cook it a little longer. Let cool for 5 minutes for the cheese to firm up, then cut and serve.

Makes eight slices or four servings.

Nutrition Information per serving (without crust):
Calories: 230 Fat: 15.2 g Net Carbs:4.2 g Protein: 16.5 g

Made with spinach added.

Chicken, Bacon, Artichoke and Spinach Pizza

Variation on the basic pizza:

1 cup cooked Chicken Breast or Thighs, chopped or shredded
1/2 cup Artichoke Hearts, cut into bite-sized pieces
4 slices of thick-sliced Bacon, cooked and broken into pieces
1/2 cup Alfredo Sauce, such as Barilla (look for lowest carb one)
1 cup Baby Spinach
1 cup Mozzarella Cheese
Parmesan Cheese to taste

Make the same way as above, but replace the zucchini layer with spinach leaves.

Makes eight slices or four servings.

Nutrition Information per serving(without crust):
Calories:222 Fat:5.2 Net Carbs: 2.7 g Protein: 16.1

Depending on the type of crust you use, the carb count will vary from about 1 net carb to 3 net carbs additional. The LC Foods pizza crust is 3 net carbs.

Want to go vegetarian? Leave off the bacon and the chicken and add more zucchini and asparagus or spinach to the pizza, along with a cup of the artichoke hearts.

Low Carb Spinach & Artichoke Cauli-Mac

A lot of yummy recipes are shared on Facebook, like this one recently posted from BuzzFeed for One-Pan Mac and Cheese. This is a delicious recipe with lots of cheese flavor and the subtle taste of the spinach and artichoke hearts just enhances it.

For me, I immediately start adapting it to a low carb version because I know that macaroni, or any pasta, is too high carb’d for my lifestyle unless I make the pasta myself from low carb flours. So far, I haven’t tried that although it’s on my to-do list.

But in this case, the easier change to the recipe is to replace the macaroni with cauliflower. If you like this vegetable, and I know some people who don’t, then it is an amazing replacement for many starches in your cooking. You can chop it and use it to replace smaller pastas. You can rice it or chop it finely in a food processor to use it as a fill-in for rice, couscous, and other small pastas. You can also use it for pizza crusts, bread sticks, and assorted other bread replacements.

As a replacement for macaroni, it is fantastic. It doesn’t have a strong flavor, particularly if you start with fresh cauliflower or use frozen that hasn’t defrosted and sat in the refrigerator for a couple of days. While this recipe is very close to the one posted, I never make anything exactly the way it’s written. In addition to the cauliflower for macaroni swap, I also added bacon, because I love bacon and this just called out for it. The artichoke hearts may be a little hard to find but you can get them either canned or frozen. If you can get frozen, those are better. Do not get marinated artichoke hearts unless they’re the only option you have. If you do, wash them thoroughly before using unless you want the taste of the marinade in your meal. While I didn’t add them this time, the next time I make this, I think adding chopped green onions would be awesome.

I also cut the recipe in half so two people don’t have too many leftovers, but you can easily double it if you want the larger dish. I used an 8″ cast iron skillet and it filled it to almost over-flowing so even the larger cast iron skillet might not be big enough for the full recipe. Also, if you are making this recipe with macaroni instead of cauliflower, use 1/2 the amount called for as macaroni expands as it cooks, so one cup dry equals two cups cooked.

Don’t like cauliflower? Try dicing turnips or kohlrabi into small cubes to fill in for the macaroni. After they are diced, cook them in boiling water or in a bowl in the microwave until a fork can easily pierce them. At this point, this resembles a scalloped potato recipe more than it does macaroni and cheese, but they are similar.

Skillet Spinach Artichoke Cauli-Mac

1 tablespoon Butter
1 clove Garlic minced
3 oz. Baby Spinach
1/2 cup Artichoke hearts, drained
1/2 pound Bacon, cooked and broken into pieces(optional)
3/4 cup Heavy Cream
1/4 cup Water
1 teaspoon Sea Salt
1 teaspoon Black Pepper, freshly ground
2 cups Cauliflower, chopped
1/2 cup Cheddar Cheese
1 1/2 cups Mozzarella Cheese

Preheat oven to 450 degrees (F.)

In an ovenproof 8″ skillet, such as a cast iron one, melt the butter, then add the garlic, spinach and artichoke hearts. Cook and stir until the spinach wilts. Add the cream, water, salt and pepper. Stir until the sauce is boiling. Add the bacon and cauliflower pieces and stir into the sauce. Cool until the sauce coats the cauliflower pieces. Add the cheddar and one cup of mozzarella to the pan and stir until it is completely melted.

Sprinkle the remaining mozzarella on top and bake for about seven minutes or until the cheese if bubbly and golden brown.

Makes 4 servings. nutrition_Cauli-mac-bacon-artichokes

Asparagus, Ricotta & Bacon Cheese Pie Is Versatile

Asparagus is figuring prominently in my recipes at the moment since a friend of mine just brought over about three pounds and left them with me.  So, I need to eat a lot of it over the next week or so!  I whipped up this yummy cheese pie featuring asparagus and bacon, two of my favorite things.   I often add ricotta cheese to my quiches and breakfast omelets, so it goes in great with this crustless pie.  It’s great for brunch, lunch or add a salad and make it dinner.

Incidently, if you missed it, I did a guest post earlier this week for The Chinese Quest with a great recipe for Asparagus Shrimp Stir Fry.  

Just want to mention that the print copy of my cookbook is on sale at Amazon for $5,85 versus $6.50.  Not sure how long this price will last, but it’s a good time to buy it if you haven’t already.  Many recipes in it are not on this website, so you won’t find them here, but you will find the color images of the photos in the book, which are black and white, beginning on this page with links to the rest of the pages.  The link to the book page at Amazon is on the right.

Asparagus Bacon Pie with salad topped with fried pork rinds.

Asparagus, Bacon & Ricotta Cheese Pie

A crustless pie made with ricotta cheese, bacon, asparagus and cheddar jack cheese. It’s garnished with more asparagus and tomatoes.

14 stalks Asparagus, 5″ trimmed
4 Eggs
1/2 cup Ricotta Cheese
1 cup Cheddar Jack Cheese, shredded
1/4 cup Onions, diced
4 slices thick Bacon,
4 large grape tomatoes (optional)
Salt & Pepper to taste
1/2 teaspoon Garlic Powder
1 oz. Heavy Cream
1/2 teaspoon Seasoning Salt

Preheat oven to 375 degrees (F.) Spray an 8″ pie dish with baking spray.

Hold back 6 asparagus spears, then slice the rest into 1 inch pieces and distribute evenly over the bottom of the pie pan.

Cook bacon until crisp and let drain and cool on paper towels while you cook the onions. Add a little bacon grease to a small pan and sauté the onions until they are just tender. Sprinkle the onions over the top of the asparagus. Break the bacon into pieces and distribute over the top of the asparagus, then sprinkle 3/4 cup of the shredded cheese over the top.

In a medium bowl, break the eggs and beat until blended, then add the ricotta cheese, heavy cream, and seasonings. Beat to mix the ingredients together. Pour over the asparagus and cheese in the pan, spreading as evenly as possible. It will settle in.

Trim the asparagus to the 4″ lengths and cut the extra trimmed off into two pieces. Position the asparagus spears on the top to form six divisions. Cut grape tomatoes and use to decorate the pie as shown.

Bake for 35 to 45 minutes until golden brown and a knife inserted in the center comes out fairly clean, It will firm up more as it cools. Let sit about 10 minutes, then cut and serve.

Makes 6 servings.

Nutrition info per serving:
Calories: 190.4 Fat: 14.3 g Net Carbs: 3.0 g Protein: 12.9 g

Tip:  This can be made with zucchini or chopped broccoli (par-boil first).  Substitute in turkey bacon if you prefer or to make it vegetarian, use a soy bacon or other vegetarian bacon.  This will affect the carb count by about .5 net carbs more per serving.

Victorious Vidalia Onions

I say victorious because the Vidalia onion has an unusual history that results from the vegetable’s birth related to the location of its planting and gaining surprising success in spite of its differences. Intrigued? Of course, you are, so read on.

Back in 1931, Mose Coleman, a Georgia farmer in Vidalia, planted a field of onions. When he tasted the onions, he discovered they were sweet, not hot as he had expected. Coleman struggled a little sell his crop, but after some convincing, he sold his first crops for $3.50 for a 50-pound bag, which was actually a very good price for the times. Other farmers weren’t doing nearly so well with their crops. With successful sales came more plantings of the “sweet” onions and the production began to flourish.

In the 1940’s, the state opened a farmers’ market in Vidalia, which was then the crossroads of some major highways. People began to refer to the onions as “those Vidalia onions” and the name was bestowed on this new sweet onion.

With time and research, Georgia agriculture realized that the soil, rain and weather conditions in the southeast of the state were perfect for producing sweet onions. The area has low sulfur soils, which prevents the bulbs from producing the pungent or hot taste that regular onions have. They like a lot of water and this also contributes to their sweetness. Having established that they have a true Georgia treasure, the state legislature declared the onions Vidalia onions and set strict regulations on their production and development. The legislation, passed in 1986, defined a 20-county region of Georgia as the growing area. The Georgia Department of Agriculture trademarked and still owns the name “Vidalia” so the only Vidalia onions come from Georgia.

Since the onions are harvested in spring and summer, that is the only times you are likely to see them in the market. I believe I have seen them now and then at the grocery store, but they are not always available. There are other sweet onions that you can use to make your batter fried onions, but they will have different characteristics. You can substitute Walla Walla onions from Washington state, Texas 1015 onions, Pecos Onions, or Sunbrero from Texas, Imperial Valley Sweet onions from California, Carzalia Sweet from New Mexico, Sweetie Sweet from Nevada, Maui Onion from Hawaii and the Bermuda onion from Bermuda.

Sweet onions are delicious on sandwiches or in a salad, but they also cook up well. They work well with many condiments, such as butter, cardamom, celery, cloves, and curry. They pair easily with mushrooms, asparagus, chiles, broccoli and any other place you might add an onion. The Vidalias bring a sweeter taste than regular onions, but still blend well with most food choices.

Nutrition information for 1 medium onion (148 grams)
Calories: 60 Fat: 0.0 g Net Carbs: 13.0 g Protein: 1.0 g

Recipes:

Almost any recipe on this site that uses onions in curry or a salad could easily benefit from a Vidalia or other sweet onion. But if you would like to try to make your own “Bloomin’ Onion” similar to the Outback’s, you can try this recipe from Alton Brown at Food Network. I tend to stay away from this because it is so delicious and the carbs are not low. You can make it using a low carb flour, but I haven’t tried it. I may see what I can do about creating “Onion Petals” that are a lower carb’d version, if I can find a Vidalia or even a Nevada Sweetie Sweet onion at the market.

Almost-Famous Bloomin’ Onion, by Alton Brown

Featured Recipe:

Vidalia Onion with Bacon Pie

Don’t have Vidalia onions?  You can make these with any of the sweet onions mentioned above.  Or with yellow onions with a little bit of sugar substitute added for sweetness, if you like.

2 Vidalia onions
2 eggs, beaten
1/2 cup sour cream
salt and pepper to taste
1/4 cup butter
2 tablespoons grated Parmesan cheese
1 pinch paprika
2 tablespoons chopped mini-peppers
1 hot dried chile crushed
1/4 cup shredded Parmesan cheese
1/2 cup Bacon pieces

Pie Crust
1/2 cup Low Carb Flour
2 tablespoons Flax Meal
2 tablespoons Lard or Shortening
1 tablespoons cold water
1/4 teaspoon Salt
1 tablespoon Parmesan Cheese, grated

Prepare pie crust by putting the flour and flax meal in a small bowl and mix, then cut in the lard or shortening to make a crumbly mixture. Add the cold water and mix to pull the flour into a ball. Chill for about 30 minutes. Put a sheet of waxed paper on a board and sprinkle a little low carb flour over it. Pat the dough into a circle in the flour on the board, then flip it over. Put another sheet of wax paper over the top and roll out into a circle to make the pie crust. While you are rolling out the crust, preheat the oven to 375 degrees (F.)

Peel off the top paper carefully, then put the crust top down into a  deep -sided 7″ or 8″ pie tin or plate and peel off the bottom paper carefully. If it breaks or sticks to the paper, ease as much in as you can, then make repairs. Crimp the edges of the crust if they come to the top. Pierce with a fork and bake for about 10 to 15 minutes until lightly browned.

Slice onions thinly. Melt 1/4 cup butter in a large, deep skillet and sauté the onions over medium high heat until tender, about 15 minutes.

Break the eggs into large bowl and beat well. Add sour cream, seasonings, peppers and bacon bits and stir together. Add onions with butter sauce and mix together.

Pour the onion filling into the cooked pie crust and spread it around evenly. Sprinkle the shredded Parmesan cheese over the top. Bake for 20 minutes, then lower the oven temperature to 350 degrees (F.) and cook another 35 to 40 minutes until the top is golden brown. Remove from the oven and let cool at least 5 minutes before serving.

Makes 8 servings.

Nutrition info per slice:
     Calories:223 Fat: 18.0 g Net Carbs: 4.4 g Protein: 9.6 g

Resources for the information in this article include  Vidalia Onion,  Food Reference, Specialty ProduceNew Georgia Encyclopedia  and Wikipedia

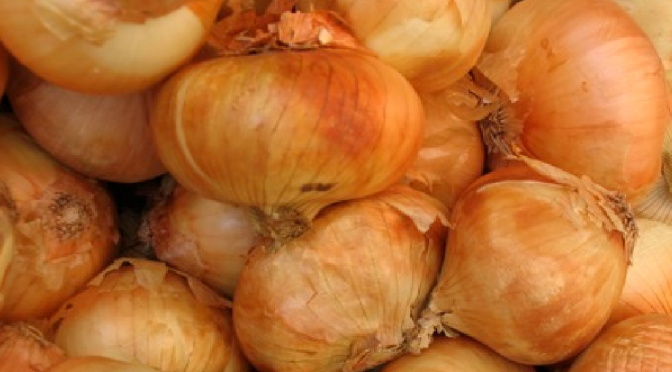
Top photo from Wikimedia Commons, used with permission – By ryan griffis (originally posted to Flickr as Vidalia Onions) [CC BY-SA 2.0 via Wikimedia Commons]

Tart and Tangy Tomatillos

When is a tomato not a tomato? When it’s a tomatillo, of course. Adding to the confusion, you have this fruit/vegetable that looks like a small green tomato, tastes a bit like one, but isn’t really one, yet is called “little tomato” in Spanish. It actually does come from the same family as the tomato, but is a completely separate genus. Its closest relative may be the cape gooseberry. Isn’t the family of fruits and vegetables amazing? So many are related but not the same. Kind of like people, huh?

Tomatillos are also known as a husk tomato,  Mexican husk tomato or tomates verdes and are a part of the nightshade family. The flowers of the plant form a calyx, or paper husk, that surrounds the fruit while it is growing. When you buy them at the grocery, this husk is usually still on the fruit. While we generally see them when they are green, they may turn colors to yellow, red or even purple when fully ripened, depending on the variety of the plant.

Hailing from Mexico, the tomatillo is used quite often in Mexican cuisine and most of the recipes I’ve found that use it are in that category. It is a prime ingredient in one of my favorite Mexican dishes, Chile Verde, a spicy pork and chile stew. It is also used in Green Chile Salsa and in several other dishes. It has a tart taste as opposed to the sweet taste of tomatoes.

Nutrition information for 1 medium fruit (34 grams)
Calories: 11, Fat: 0 g, Net Carbs: 1 g, Protein: 0 g

Featured Recipe:

Being the adventurous sort in the kitchen, I wondered if tomatillos would be as tasty as green tomatoes in Fried Green Tomatoes, so I tried them. First, I will say that they get more tart as they cook, so there is a definite acidity to them. They benefit from a dipping sauce like Chipotle Ranch dressing or just some mayonnaise or Miracle Whip.  If you give them a try, let me know what you think.

While they are not too high in carbohydrates, keep the servings small, only two per serving.

fried-tomatillos-03950

Fried Tomatillos

Although not a tomato, a tomatillo is similar but smaller and does not turn red. This uses a basic batter recipe to cook the tomatillo as you would a green tomato.

1 Egg, beaten
1/4 cup Buttermilk
2 tablespoons Low Carb Flour (Almond flour)
2 tablespoons Cornmeal or Golden Flax
2 tablespoons Coconut Flour or Carbquick
1/2 teaspoon Salt
1/4 teaspoon Cayenne Pepper
2 tablespoons Parmesan Cheese
2 Tomatillos, cleaned and cut into 1/3 inch slices
Vegetable oil

Mix the egg and buttermilk together in a small bowl. Mix the 2 tablespoons of the low carb flour, corn or flax meal and seasonings together in a shallow pan or bowl. Put the Coconut flour in a small bowl. Pull a slice of tomatillo though the coconut flour to lightly coat, then dip in the egg mixture and shake off excess egg. Put in the cornmeal or flax mixture and gently press to coat the slice on both sides. Repeat with the rest of the tomatillo slices.

In a small skillet, pour enough oil to come about 1/4 inch up the pan and heat until about 375 degrees (F.) or very hot, reduce to medium high heat to prevent overheating. Drop just a tiny bit of the batter in to see how quickly it cooks. Carefully put in the tomatillo slices, two or three at a time and cook for about 2 minutes on each side or until golden brown.

Drain on a paper towel and sprinkle with a little seasoning salt, if you wish. A little tart, but delicious just as they are or dip in low carb Chipotle Ranch dressing.

Makes three servings

Nutrition Info per serving made with cornmeal
   Calories: 133.4 Fat: 6.8 g Net Carbs: 7.8 g Protein: 7.0 g

Made with flax meal and Almond Flour
   Calories: 122.5 Fat: 8.1 g Net Carbs: 3.4 g Protein: 7.4 g

Information for this article was pulled from Specialty ProduceNature’s Pride and Wikipedia

All photos by Rene Averett for Skinny Girl Bistro. Copyright 2015.