Category Archives: Mexican/Spanish Recipes

Zest for Zucchini

Zucchini is one of the favorite vegetables of the world and it certainly ranks high in my culinary endeavors. It is delicious almost any way you prepare it and there are countless ways to use it in your cooking from salads, to main course to appetizers to desserts and breads. However, zucchini is part of a much larger family that includes other summer squashes, winter squashes, melons and cucumbers. Yep, they are all related, some a little closer than others.

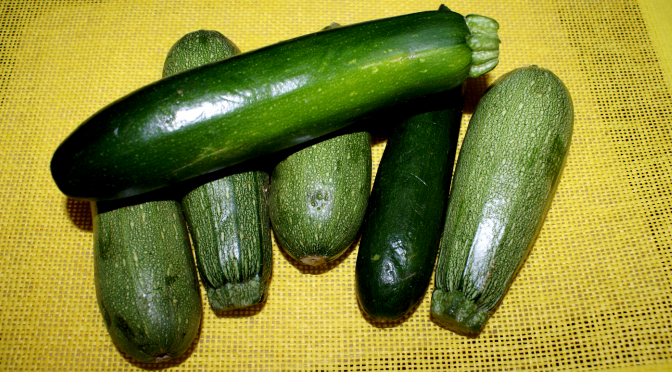
Greenhouses, importers, and various growing locations worldwide have ensured that we can find zucchini in grocery stores at any time of the year. Others in the family, like yellow, crookneck and scallop squashes don’t show up as consistently. They each have their own unique flavor and blend well together when cooked. Zucchini has a delicate flavor, an edible skin, and a creamy off-white flesh. Generally the smaller, 3 to 4-inch vegetables are the best for eating since the seeds are smaller and edible and the flavor is at its best, I think. As they get bigger, they get tougher, seeds are bigger and the flesh isn’t as sweet. If you are stuffing a zucchini, try to look for about 5” and as big around as you can find.

Besides the delicious vegetables — oh, wait, that isn’t really a vegetable, but a fruit! It is formed in the same manner as fruits, so technically it is one of them. But I will continue to count it in the vegetable column. The zucchini also produces an edible golden flower. I admit, I have never cooked one of the flowers, although they are popular fried. I did have a couple of plants one summer that did not cross-pollinate because the flowers were all I got. The male flower blooms first to attract bees and the female blossom, which has the bud of a tiny fruit under it, needs to be pollinated by the bee. If this doesn’t happen, no zucchini will form. I was once told that you need at least two plants, but that apparently, isn’t necessary so long as the plant produces a female blossom. If no bees are in the area, you can transfer some of the pollen using a Q-Tip to dip into the male flower and put it in the center of the female bloom. Doesn’t that sound romantic?

All squashes have their ancestry in the Americas, but they have spread around the world. They are easy to grow and mature quickly. It’s one of the few plants that I can actually get a decent crop from in the micro-climate of South Reno. Native Americans called squashes one of the “three sisters” in their culture. The other two were corn and beans, which are also native to the Americas. The squash blossom is a popular design motif in Native American art and jewelry.

The squash we now call zucchini was developed in Italy from the root squashes brought back from America. It was cultivated,  in the late 19th century and likely near Milan. The name came from zucca, which is the Italian word for pumpkin or squash and the suffix “ino” or “ina”, meaning little and becoming zucchini in the plural form. The French called it “Courgette” and it is known that way in much of Europe, so if you see that in a recipe, you know it is zucchini or vice versa. They are known as baby marrow in South Africa.

As little as 30 years ago, the zucchini was barely known in the United States and it was referred to as the Italian squash. It was likely brought to the country of its ancestors by Italian immigrants. But it took hold and has become  popular to eat and grow.

Going back to its roots, zucchini, like all summer squash, is delicious with its other two sisters, corn and beans, and popular in Native American and Mexican foods. While beans and corn are used sparingly in a low carb lifestyle, summer squashes are very low in carbohydrates, which makes them awesome!

Nutrition information 1 medium (196 g)
Calories: 33 Fat: 0.5g Net Carbs: 4.0 g Protein: 2.4 g

Recipes

There are several recipes on this site that feature zucchini:

Bacon & Zucchini Stuffed Sole
Zucchini Fritters
Chicken with Tomatoes & Zucchini
Zucchini and Sausages Bake

Featured Recipe

Since Cinco de Mayo is just around the corner and the squash is a Native American, which includes Mexico and South America, crop, it seems apropos that the recipe should honor that heritage. The Mexican name for squash is calabacitas and the Mexican zucchini is similar to the Italian one but more rounded and tear drop shaped. This is an original recipe I’ve developed over the years.

Calabacitas y Carne Con Queso

Mexican Squash with Meat and Cheese
Recipe by Rene Averett

3 cups Mexican Zucchini (or regular zucchini)
1 lb Beef, ground
1 can Chiles, mild or medium to your preference
1 cup Cheddar Jack Cheese, shredded
1/2 cup Mexican Cheese, Queso Fresco or similar
1/2 cup diced Onions
1 cup canned Diced Tomatoes, with juice
2 Low Carb Tortillas
1 cup Jicama, shredded or cubed or Daikon Radish, chopped
1 clove Garlic, minced
1 tablespoon Olive Oil
1/2 teaspoon ground Cumin
1 teaspoon dried Mexican Oregano
2 tablespoon fresh Cilantro
1 teaspoon Cayenne Pepper

Preheat oven to 350 degrees (F.)

Slice zucchini into 1/4″thick rounds.

In a large skillet over medium heat, add olive oil and heat a minute or so, then add garlic, jicama and onions. Stir cook the onions until they are fragrant and shiny. Add ground beef and lightly brown, then add seasonings, chiles and diced tomatoes. Stir and cook for about 10 minutes until hot and bubbly. Stir in the fresh cilantro.

Spray a round 2 qt. casserole dish with baking spray. Layer 1/3 of the zucchini on the bottom of the dish. Pour 1/3 of the meat mixture over the top, then sprinkle 1/3 cup of cheddar jack cheese over that. Put a tortilla on top and repeat with another layer of zucchini followed by the meat and cheese. Put the second tortilla on top and use the rest of the zucchini, meat and cheese on top of that.

Bake for 25 minutes until the casserole is hot and bubbly. Sprinkle the Mexican cheese over the top and return to the oven for another 5 minutes to melt the cheese.

Makes 6 servings.

Nutrition Info per serving :
Calories: 260 Fat:17.0 g Net Carbs: 8.7 g Protein: 16.3 g

And it’s Z-end of the the A to Z blog challenge! I will resume my usual Tuesday post schedule next week, but I thank everyone who stopped by to visit and comment during the A to Z Challenge. I hope you will continue to visit now and then.


Input for this article came from World’s Healthiest Foods,  Nutrition and You, Wikipedia, and The History of Zucchini.

All photos taken by R. Averett for Skinny Girl Bistro.

Nurture with Nopal

I have a fairly good-sized prickly pear cactus growing in my yard that arrived there by bird farmers or some other means and it has yielded a few pears over the past two years. Our neighbor’s desert tortoise is particularly fond of the pads and she often snacks on them. The Mexican name for this cactus is nopal or nopales and it is a source of food, nutrition and, possibly, medicines for humans.

Nopales are native to Mexico and spread over the Southwest in general. The root species is the Opuntia cacti. There are actually 114 known species of this cactus family and the leaves of all of them are edible. In Mexico, the cactus pads are popular in many foods dishes, using both raw and cooked pads. In the spring, the cacti produce beautiful, colorful flowers that mature into prickly pears or tunas, a seedy fruit that can be made into jam, jellies and juices or eaten fresh. The taste is described as a blend of watermelon and strawberry, but I haven’t noticed it so much. I tasted the uncooked pad and found a similar taste to watermelon with just a touch of sweetness.

Using Cacti

When dealing with this cactus, you need to take care to avoid the many little spines that inspire the name prickly pear. Gloves or tongs are very useful in handling these items. In order to use the pads or the pears in cooking, you need to carefully remove the spines. Here’s a video from Rivenrock Gardens, a company that sells Nopales, on how to clean the pads.   Cleaning Pads

The pears are equally as tricky to work with, but there is a quick trick to peeling them and using them without stabbing yourself. Using tongs or forks to handle the pear, you follow the basic directions in this video from The Produce Guy for cutting the pear, just being careful not to touch them with your hands. It helps to wear gloves. If you buy them at the grocery, they are probably already cleaned of the spines so they are safe to handle.

Here’s a tip: If you do get one of the spines in your hand, use white glue to remove it. Simply spread the glue over the sore spot, let it dry and pull it out. It will grab the hair fine spine with it.

Health Benefits

At this time, many of the possible health benefits are being researched, but it is believed to be of use in treating type 2 diabetes. It is high in fiber and pectin, which can reduce sugar absorption in the digestive tract. It is also rumored to be good for treating colitis, obesity and high cholesterol. As more research is done, it will be interesting to see if this is an effective food.

Nutrition information for 149 g (about 1 cup)
Calories:22 Fat:0 g Net Carbs:2.0 g Protein:2 g

I have only used Nopal a few times in the past couple of years, but here is a recipe from this site:

Prickly Pear and Orange Marmalade

Here’s a new recipe that uses the pads:

Nopalitos with Chorizo and Eggs

1 young Nopales Pad, cleaned trimmed, and cut into strips
1/2 cup Pico de Gallo
1 Serrano Pepper, chopped
4 large Eggs
1 teaspoon Mexican Oregano
1 teaspoon Chile Powder
1/2 cup Chorizo sausage
1/2 cup shredded Cheddar Jack Cheese
1/4 cup Queso Fresco
4 Low Carb Tortillas, 7 inch

Cook strips of nopalitos in water with 1/2 teaspoon salt and 1/2 teaspoon oregano. Drain when they are tender.

In a skillet, heat one tablespoon oil, then add the nopalitos for a few minutes. Add the Pico de Gallo, Mexican oregano and Serrano peppers and continue to cook until the onions are almost done. Remove to a bowl.

Add a little olive oil to the pan, then add chorizo sausage and stir fry until it is lightly cooked. Add the vegetables back to the pan and add chile powder.

Beat eggs in a bowl, add a bit of salt and pepper and a little more oregano. Add eggs into the mixture, continuing to stir as they cook. Sprinkle cheddar jack cheese over the top and remove from the heat.

Warm up tortillas over the burner or in the oven. Serve eggs and sprinkle a little Queso Fresco over the top.

Serve with tortillas. Makes 4 servings

Nutrition Info per serving
   Calories: 339 Fat: 24.1 g Net Carbs: 6.9 g Protein: 23.3 g

* If you can’t find tortillas, you can eat them with a low carb flat bread or pita bread or without bread. Low Carb tortillas are 3 nc per tortillas, so that would be 3.9 nc for the meat and vegetables.

All comments relevant to my posts are welcome. SPAM is not. If the post has nothing to do with my site content, it will not be posted

Information for this article came from Wikipedia, Web M.D.Nopal ExportNutrition and You.com and Rivenrock Gardens

All photos taken by R. Averett and copyright Skinny Girl Bistro

Iceberg is Ideal for Salads

Really, it is. Oh, sure, there are those that criticize, saying that it lacks in any real nutritional value and maybe there is truth to that. But Iceberg Lettuce has a clean, refreshing taste and keeps pretty well in your refrigerator for at least a week, which some other lettuces don’t do as well. Although it’s low in nutrition, it is only a little below Romaine lettuce, which is my other favorite lettuce. The Iceberg lettuce is largely water, but it has a sweet, clean taste where some of the other, more nutritious lettuces, can be a bit bitter and not as refreshing. The ideal, in my opinion, is a mix of the lettuces for variety.

Iceberg lettuce is the one you find most frequently in restaurant salads. The lettuce is also great on sandwiches or for making lettuce wraps because of its nicely cupped, large leaves. It is the primary lettuce used in the United States.

Lettuce Origins

All lettuces trace back to the Mediterranean area where lettuce was first cultivated for its leaves in ancient Egypt, with evidence of that dating to about 2680 BC. Originally, it was grown for the oil produced from its seeds. The Egyptians considered it the sacred plant of Min, their god of reproduction. The cultivated variety appeared to be about 30 inches tall and resembled a larger version of the modern romaine lettuce. The Egyptians passed the seeds along to the Greeks, who then shared with Romans and more varieties were developed. Writings by Joachim Camerarius in 1586 described the three basic varieties of modern lettuce, which are loose leaf, romaine and head lettuce, such as iceberg and butter.

Christopher Columbus brought the lettuce to America in the late 15th century. Meanwhile, more varieties were being developed in Europe. Many of these are still grown in gardens today. I grew a mixture of lettuce a couple of years ago, but pulling leaf by leaf didn’t seem very rewarding. I grew a butter lettuce last summer and that was good, but you only get one head per plant, although after I harvested it, the plant did continue to produce leaves. In the late 19th century, documentation indicates between 65 and 140 distinct varieties.

Because lettuce has a relatively short life span once it is harvested, it didn’t expand into wide spread use until the 1900’s when packing, storage and shipping technology improved. To ship the fresh vegetable long distances,in the 1920’s, crisp head lettuce was shipped in train cars, filled with crushed ice to keep the lettuce chilled. The crisp head lettuce shipped this way came to be known as iceberg lettuce since the ice resembled icebergs. Incidentally, prior to the advent of ice-making facilities, ice used to be harvested in the Sierra Nevada mountains near Donner lake and brought down by train to Sacramento for shipping fresh produce. In the 1950’s vacuum cooling revolutionized the industry. This allowed the lettuce to be cooled and packed in the field, which kept it fresher to market.

Lettuce Uses

Around 50 AD, the Romans cooked and served lettuce with an oil and vinegar dressing, although they sometimes ate them raw. Between 81 and 96 AD, the lettuce salad prior to a meal became a tradition. In China, salads were made primarily from cooked vegetables and the lettuce was worked into all kinds of dishes from wraps to stir-frys and in other meat dishes along the way. Now days, we use lettuce in salads, wraps, sandwiches, and other ways and occasionally still cook it.

Personally, I haven’t tried cooking iceberg lettuce, although some of the loose-leaf varieties seem like they would go well in a skillet of greens. However, I did find a recipe from OceanMist for Fire Charred Iceberg Salad. This just might tempt me to try it. If you do it first, report back, please.

Nutrition Information for iceberg lettuce – 1 cup
Calories:10 Fat: 0 g Net Carbs: 1 g Protein: 1 g

Here are a couple of my quick and easy recipes for lettuce cups, which are really great for a low carb lifestyle.

Taco Lettuce Cups

4 large leaves Iceberg or Butter lettuce
1/2 lb Ground Beef
1/4 lb Chorizo
1 tablespoon Taco Seasoning
1/4 cup Pico de Gallo
1/2 cup chopped Baby Corn
2 tablespoons Black Beans
1/4 cup Butternut or Acorn Squash, cubed
1/4 cup Salsa
1/2 cup Cheddar Jack Cheese, shredded
1 small Avocado

Precook squash in the microwave or in a suacepan with a little water until it is fork tender. Cut into samller pieces.

Cook ground beef and chorizo in a skillet until lightly browned. Add taco seasoning, squash and a little water to make a moist filling. Stir in the baby corn and beans. Cook about three to five minutes to heat the corn and beans.

Put the lettuce leaf on a salad plate, spoon 1/4 of the ground meat on it, then top with Pico de Gallo and 1 tablespoon of Salsa. Add about two tablespoons of jack cheese over the top, and crown with slices of avocado. Fold the lettuce over and serve with sour cream.

Makes 4 tacos.

Nutrition Info per taco:
Calories: 424.8 Fat: 33.3 g Net Carbs:6.1 g Protein: 22.3 g

All comments relevant to my posts are welcome. SPAM is not.  If the post has nothing to do with my site content, it will not be posted.

Information for this article was helped by these pages:  Wikipedia, About Health, Livestrong.com and Oceanmist.com

All photos are by R. Averett, Copyright Skinny Girl Bistro

Light and Delicious Pumpkin Flan

Fall is beginning to really arrive in many parts of the country.  Here, in the Truckee Meadows of Northern Nevada, it’s an overcast, blustery day and trees are beginning to change colors.  My pear tree is a mixture of red-orange and golden leaves from the multiple varieties grafted onto it.  My pumpkin vine failed to produce any pumpkins, but luckily, the grocery stores have canned available.  I usually pick up several cans in the fall to last me year ’round because I love pumpkin!  I like to have Pumpkin Butter with my low carb muffins or spread it on the top of little cakes.  Pumpkin pie should be savored year-round.  Not to mention those Pumpkin Madeleine cookies that I posted recently or luscious Pumpkin Cheesecake.   And there’s the old stand-by for breakfast, Pumpkin Pancakes!

So, here is another lovely pumpkin dish.  A flan is a Spanish dish that is like a custard, usually with a caramel sauce, and it is very easy to make.  My recipe will make six little ramekins of these delicious desserts.  You will need six 1 cup ramekins or you can make them in a muffin tin.  Just be sure you have a pan large enough for the tin to sit in.  My recipe uses coconut milk or almond milk, so it is good for those of you who can’t tolerate cow’s milk.  It also makes it lower carb than using heavy cream, but you can substitute that in if you prefer the richer taste.

Not crazy about pumpkin?  Are you nuts!  Seriously, I know there are some people who don’t really like it, but you can try this Orange Flan recipe instead. (It’s near the bottom of the new page.)

Light Pumpkin Flan

3/4 cup Sugar Free Maple Syrup
3 large Egg
1/3 cup Sugar Substitute
3/4 cup Pumpkin Puree
1 tablespoon Pumpkin Pie Spice
1/2 teaspoon Ground Clove
1 – 1/2 teaspoon Vanilla
1/4 teaspoon salt
1 -1/2 cup Almond Milk or Coconut Milk (or heavy Cream)

Preheat oven to 300 degrees.

Heat maple syrup in a small pan over medium heat and add 1 tablespoon of granulated sugar substitute.  Cook until the sugar is blended in.

Butter or spray six one cup ramekins or six large muffin wells, put 2 tablespoons of the syrup in each and roll around the bottoms to coat. Mix the remaining ingredients together until smooth. Pour into ramekins, dividing mixture evenly to about 1/2 inch from the top.

Put the ramekins or muffin pan into a large pan that is deep enough to add water at least half way up the sides of the pan or ramekins.  Be careful not to get water in the ramekins.  Carefully place in the center of your oven.

Bake for 50 to 55 minutes or until the custard is set. Chill for at least 4 hours before serving. Garnish with a dollop of whipped cream or cool whip.  You can also top with a few roasted pumpkin seeds for a bit of crunch if you like.

Makes 6 servings.

Nutrition Info with almond or coconut milk:
Calories: 59 Fat: 3.2 g Net Carbs: 2.4 g  Protein: 3.8 g

Nutrition Info with heavy cream:
Calories: 256.8 Fat: 24.6 g Net Carbs: 4.1 g Protein: 4.8 g

Quick Beef Enchilada Casserole

Enchiladas are spicy and very tasty and are a part of my childhood onward.  I love the many varieties, but sometimes I don’t have time or the patience to make the rolled ones.  The easiest way to make enchiladas is into a casserole rather than rolling each one individually. It doesn’t come out as pretty, but it tastes as good. This low carb version uses low carb flour tortillas (3 nc each) that are not pre-fried briefly in oil, although you could do that if you would like to add a fried bread flavor to the dish.

1 lb Ground Beef
3/4 cup Onion, chopped
4 Low Carb Tortillas (6″)
4 oz. can Green Chiles, chopped
10 oz. can Red Enchilada Sauce
2 teaspoons Taco Seasoning
1 teaspoon red Chile Powder
1 cups shredded Cheddar Jack or 4 Cheese Mexican Cheese
1 tablespoon Butter

Preheat oven to 350 degrees (F.)

Prepare a casserole dish by spraying with cooking spray or rubbing oil on the bottom and sides.

In a large skillet, lightly brown the ground beef, breaking it into small pieces. Drain any fat off. Add the Taco Seasoning and 2 tablespoons of water and mix into the ground meat until it is blended. Remove the meat to a bowl. Add 1 tablespoon of butter to the skillet and sauté the onions until they are tender. Mix the meat into the onions. (If you wish, you can sauté the onions first, then add the ground beef and cook it all together, then stir in the seasoning mix.)

Put the enchilada sauce in a small pan and add the Chile Powder to it to give it a little more flavor and cook for a few minutes.

Pour about 2 oz. of sauce on the bottom of the casserole pan, then place a tortilla on top. Spread another 2 oz. of sauce on top of the tortilla, then put 1/3rd of the ground beef mixture on top, then put 1/4 of the cheese on top of that. Add the next tortilla and repeat with sauce, beef and cheese, then add the third tortilla and repeat again. For the top level, put the last tortilla on, top with remaining sauce and cheese.

Bake for 30 to 40 minutes, until the cheese it melted and just toasted on top.  Serve with sour cream and a green salad or Spanish Cauli-rice or Roasted Cauliflower topped with turmeric.

Makes 6 servings.

Nutrition Info: (per serving)
Calories: 396 Fat:25 g Net Carbs: 7.2 g Protein: 34.4 g