On hot summer nights, you don’t want to spend too much time in the kitchen cooking and you don’t want to turn on the oven. Here’s a quick stir fry recipe that just fits the bill. You can prep the meal in the morning or the night before and store in the ‘fridge until you’re ready to cook. It has a great sweet and spicy taste from low carb honey and brown sugar substitute combined with Chinese style chili sauce. Just enough bite to give it zing and not too sweet. Add cauli-rice to serve and a nice green or cucumber salad to complete the meal. By the way, this recipe also works great with the other white meat – chicken!
Sweet & Spicy Pork
1 tablespoon Brown Sugar Substitute
2 tablespoons Sugar-free honey
1/4 cup Soy Sauce
2 teaspoons Ginger Paste
2 teaspoons chopped Garlic
2 tablespoons Chinese Chili Sauce
salt and pepper to taste
1 pound boneless Country Pork Ribs, cut into 1″ cubes
3 Green Onions, cut into 1/2 -inch pieces
1 tablespoon Oil (Olive or Coconut or Canola)
In a small bowl, combine the brown sugar substitute (I use LC Foods), sugar-free honey, soy sauce, ginger paste, garlic and hot sauce. Cover with a plastic wrap until ready to use.
Lightly salt and pepper the pork cubes. Slice the onions, using most of the green sections as well as the bottoms.
Heat the oil in a large skillet or wok over a medium high heat and add the onions. Cook and stir for about three minutes, then add the pork and brown the pieces on all sides. Takes about 4 to 5 minutes total. Pour the sauce over the pork and simmer until the sauce thickens, about 8 to 10 minutes.
Serve over 1/2 to 2/3 cup Cauli-rice for a fabulous meal. As an alternate to the cauli-rice, you can also serve over 1 cup stir-fried shredded cabbage or even mix the two for added flavor.
Nutrition Info per serving (pork dish only): Calories: 365 Fat: 25.5 g Net Carbs:1.6 g Protein: 28.3 g
Tip: If you can’t find sugar-free honey, you can use 1 tablespoon regular honey. It will increase the net carbs to 6.4 g and calories to 385 per serving.
Let’s start the hot days of summer off right with a dish that is quick and easy to make for breakfast, lunch or supper. Frittatas are very versatile. Zucchini is a summer squash, but really, it’s available year round. It works well with eggs and sausage in this delicious frittata. Basically, a frittata is an Italian flat omelet that is either finished off by cooking on the stovetop with a cover over the pan to bake it or placing it in the oven to bake. I used a lid over the skillet for this version. They are easy and very tasty. For a crisp top on the frittata, put it under the broiler for about 5 minutes.
Zucchini Sausage Frittata
By Rene Averett
3/4 cup Zucchini – sliced 1/8″ thick
1/4 lb. Italian Sausage, pork
2 tablespoons Sweet peppers, chopped
2 to 3 large Eggs
1 tablespoon Heavy Whipping Cream
1 teaspoon Coconut Oil or Olive Oil
1/4 cup Mozzarella Cheese, shredded
1/4 teaspoon Seasoning Salt
1/8 teaspoon Black Pepper
1/4 cup fresh Kale, chopped
Break the sausage into small pieces and cook in a 6″ skillet until lightly browned. Turn off heat or remove from heat source. Remove to a paper towel to drain.
Add oil to the skillet and arrange the zucchini slices into a circle around the pan, overlapping where necessary to fill the pan. Sprinkle salt and pepper on top.
In a small bowl, beat eggs, cream, sweet peppers and kale together. Add a bit of water if it is too thick. Return the pan with the zucchini to the stove and cook over medium heat until the zucchini begins to look translucent. Add the egg mixture, pouring over the zucchini to distribute the vegetables as evenly as possible. Distribute the sausage on top.
Let cook a few minutes until the egg is set and the edges are bubbly. Put a lid or an inverted pan over the top to keep the heat in. This will begin to cook the top of the frittata. After three or four minutes, remove the lid and sprinkle the cheese over the top. Return the lid and cook another three or four minutes until the egg is completely set and the cheese is melted.
Carefully turn the frittata out onto a plate by putting the plate on top of the pan then flipping the two together. Cut the frittata in half and serve. Makes two servings.
Half of the frittata with 1/3 cup of pasta sauce on top.
If you wish, you can add a low carb pasta sauce on top of the frittata and warm it in the microwave for 30 seconds. (You can also microwave it if the frittata isn’t done enough to your liking.) This is a versatile recipe and you can swap out meats and vegetables as you like.
Nutrition Info per 1 serving Calories: 320 Fat: 24.6 g Net Carbs: 3.9 g Protein: 18.4 g
With the 4th of July holiday coming up this weekend, I am looking for some of the great food that I enjoyed as a kid. One of the key items from my childhood was making homemade ice cream. My brother and I shared the job of churning the ice cream and it was the old turning-the-handle method, not an electric motor doing it. We’d sit out in the back under the shade of a tree and turn it for what seemed like hours, but really wasn’t that long. When it got tough to turn, the ice cream would go into the freezer to cure. That was the best tasting ice cream ever. But things change.
Now ice cream is a rare luxury and I look for low carb ice cream. In my area, I can find vanilla Breyers Carb Smart, which is soft, creamy and has a wonderful flavor. For a while, Wal-Mart carried the chocolate Carb Smart also, but I haven’t found it recently. They also make ice cream bars. A 1/2 cup serving of Carb Smart is 4 net carbs, so it can work easily into a strict low carb lifestyle. There are a few other brands that have ice cream that is lower in carbs, but not as low as CarbSmart. Check out your grocery store if you are looking for pre-made ice creams and be sure to look at the net carbs.
The drawback is that the flavors available are vanilla and chocolate. You can use the vanilla as a base and add other ingredients to it to create additional ice cream flavors. Or you can make your own.
Recently, we acquired a Cuisinart Soft Service Ice Cream maker and I started experimenting with it. One of the first ice creams I made was Strawberry Yogurt Ice Cream. What could be better for red in the red, white and blue for the 4th of July? So here’s the recipe. If you don’t have an ice cream maker, I’m including the instructions to make it without one.
Strawberry Frozen Yogurt
12 oz (2 containers) Kroger Carbmaster Strawberry Yogurt or Oikos Plain Greek Yogurt
1 – 1/2 cups Strawberries, fresh or frozen
1/2 cup Heavy Whipping Cream
1/2 cup cold Water
1/2 cup Sugar Substitute
1 teaspoon Strawberry Extract
1/2 teaspoon Vanilla
Put strawberries and sugar into the food processor and pulse until the ingredients are smooth and blended together. Add heavy cream, extracts, yogurt and cold water. Refrigerate for 30 minutes or until ready to make the ice cream.
Turn on the ice cream maker and pour in the ingredients. Allow to mix for 12 to 15 minutes before checking for consistency. If it isn’t frozen enough, let it freeze another 5 minutes and check again. Repeat until it is the desired consistency. Remove ice cream from the freezer bowl and put into a container with a tight lid, placing plastic wrap over the top of the ice cream to prevent freezer burn.
Freeze for at least 30 minutes. It will harden or cure into a harder ice cream. Serve and put any leftovers back in the freezer. To serve the next time, remove about fifteen minutes before serving to allow to soften. This gets very hard.
Makes 10 servings.
Nutrition Info per serving (Plain yogurt will be a little higher in carbs.) Calories: 144.2 Fat: 13.5 g Net Carbs: 3.4 g Protein: 2.4 g
To make without an ice cream maker, maker the mixture up as above, then pour it into a 2 to 3-quart glass pan, cover with plastic wrap and freeze until it is almost solid. This will vary with your freezer and the depth of the pan. Check it on every hour. Pour or spoon the almost frozen mixture into a blender or food processor and mix until it is creamy and thick. Pour back into the glass dish or into a container with a lid and freeze for at least four hours. It should be solid and will have to thaw a little before serving.
This recipe came through a Facebook post that originated from Budget101’s blog, who in turn got it from the Maine Cookbook. I wanted to adjust it just slightly for low carb, and really, the main adjustment was to eliminate the breadcrumbs. But, having watched Emeril for so many years, I needed to kick it up a notch, so I changed the spinach to a spinach and kale combination and added bacon bits. You can’t go wrong with bacon. If you don’t like spinach, but do like kale, then make the filling all kale and vice versa. Want to kick this up a little more? Add 2 or 3 tablespoons diced green chiles to the filling.
If you can’t find pepper jack cheese where you live, look for a semi -hard white cheese with pepper in it or you can add chile peppers to it.
Incidentally, for the curious, the vegetable in the picture is celery root, diced and boiled until fork tender, then pan fried in a little coconut oil until lightly browned. I put a little jack cheese on top. The green veggie comes from a local grocery store and is broccoli salad.
Spicy Chicken Stuffed with JackCheese and Greens
6 boneless, skinless half chicken breasts (6 oz. each)
4 oz pepper jack cheese, shredded
2 cups fresh Spinach, chopped
1 cup fresh Kale, chopped
2 tbsp Olive Oil
1/4 cup Bacon Bits
1 teaspoon Cajun Seasoning or other spice
Salt
Black Pepper
Toothpicks, soaked in water
Preheat oven to 350 degrees (F.) Prepare a baking pan with foil or with parchment paper. Spray with cooking spray.
In a skillet, heat1 tablespoon olive oil, then add chopped spinach and kale. Sauté until they are wilted but not limp. Add bacon bits to the pan and mix it together, but don’t cook anymore. Set aside.
Cut chicken breasts down the middle but not all the way through to make a pocket or butterfly. If they are thicker than 1/4″, pound them with a meat mallet or put plastic wrap over the top and use a rolling pin to flatten. If you don’t do this, the breast may take longer to cook.
All wrapped up and ready for final steps.
In the pocket of the breast or the middle, add jack cheese, then spread the spinach mixture on top. Do not overstuff them. Fold the chicken over the stuffing and secure with toothpicks. Tuck the end of the chicken in and secure it.
Place the chicken, seam side up on the pan and brush with olive oil. Sprinkle the Cajun seasonings, salt and pepper on top. If you have leftover spinach, hold it until the chicken is almost done. Bake the chicken for 40 minutes until the juices run clear. Put the additional spinach on top and add any leftover jack cheese, if you wish. Return chicken to the oven for another five minutes to melt the cheese.
Serves 6
Nutrition Info per servings: Calories: 301.3 Fat: 13.1 g Net Carbs: 1.4 g Protein: 41.1 g
I tried the LC Cinnamon Rolls a couple of weeks ago and they were good, although small and somewhat troublesome to make. Read my review here. So this week, I am trying the Cinnamon Swirl Bread Mix from DCC. These are not really a cinnamon roll, but they have more cinnamon in them than many commercially made Cinnamon Breads from the market. They are also not a yeast bread, but more of an egg bread.
The mix goes together easily with the add-ins you need being 3 large eggs, 3 tablespoon soft butter, 1/4 cup sour cream, 1 teaspoon of oil and 2 tablespoons of water. The package has two packets in it; one has the bread mix and the other has the sugar free cinnamon sugar. You also need a 4”x 8” bread pan. This is the smaller loaf pan you usually use for fruit bread rather than the standard-sized loaf pan. To make it, you simply mix the first packet with the bread mix in with all the add-ins and stir, whisk or beat on a very low setting on the mixer to blend it together. Put 1/2 of the batter into the pan and spread it smoothly, then cut open the second pack and sprinkle the cinnamon over the batter evenly. Although it says to put all the cinnamon on this level, I saved some for the top because there is a lot of it.
Batter sitting on top of the cinnamon layer waiting to be spread.
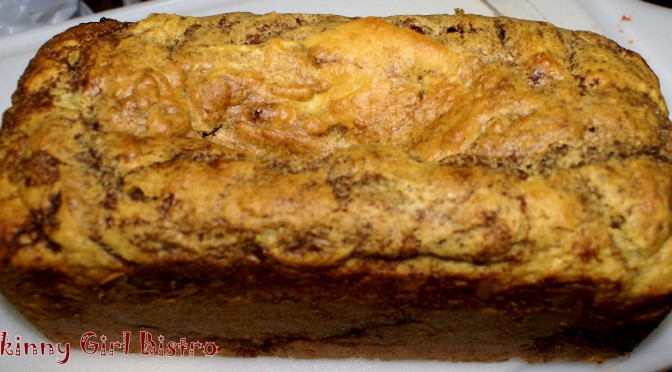
Next you add the rest of the batter over the top of the cinnamon, smooth it out evenly. Add the rest of the cinnamon if you save some like I did, then use a knife to pull through the batter to spread the cinnamon into swirls. There’s really no right or wrong way to make this distribution. Just try to spread it evenly through without actually mixing it into the batter. Smooth the top out again and put it in a preheated 350-degree oven for 30 to 35 minutes. I cooked mine 30 minutes and it was a lovely golden brown, but I let it go a few minutes longer and pressed against the top to get the spring back. When it cooled, it did sink in the middle and was not completely cooked in the center. So I would say, depending on your oven, this might take 35 to 40 minutes to cook completely.
The flavor is wonderful. It has a very strong cinnamon flavor, as one would like a cinnamon bread to have, and it is more like bread than a coffee cake. A slice of this with a cup of coffee or tea makes a wonderful snack or light breakfast. Additional butter on top is optional. I don’t think it’s sturdy enough to pop in the toaster, but it would warm in a toaster oven or a microwave easily.
Ingredient-wise, the mix contains unbleached flour, soy isolate, cereal fiber, fructosaccharide (a naturally occurring fructose in plants), low glycemic monosaccharide (a simple low glucose sugar), baking soda, corn starch, dried egg whites, cinnamon, ground soy, vanilla powder, sucralose and low glycemic fruit concentrate. Sounds like a lot of chemical stuff, doesn’t it? But most of it is extracted from plants and is commonly used in baking.
The mix costs $9.30 plus shipping from Dixie Diners or you can buy it through Netrition.com for less (currently $7.29 plus shipping – hint, your whole order ships for $5.99 so order everything you want at one time). One of my biggest complaints about low carb mixes is that they are pretty pricey. In fact, almost any food mix that doesn’t use standard flours and sugar are usually more than double in price. I appreciate that these companies have gone to a lot of work and expense to develop the mix formulas, but it seems they would sell more if they weren’t so high.
Nutrition info for 1/16 of the loaf – it makes 16 slices. I usually cut it in eight slices, then cut each of those in half rather than trying to make 1/2-inch cuts.
Calories: 66 Fat: 0 g Net Carbs: 3.0 g Protein: 2.0 g
You could easily make these in muffin cups, making individual cinnamon rolls. Separate the batter into two sections, put about 1 tablespoon from the first section into each of 12 muffin cups, then sprinkle the cinnamon on top of each roll and add the rest of the batter from section 2 by tablespoons on top of that. Swirl the cinnamon through to mix and level the tops. Bake for about 25 to 30 minutes.
You could also add chopped nuts to the cinnamon layer if you’d like. For a dozen rolls, you would increase the net carb count to 4 nc per muffin.
On a scale of 5 spoons being the top, I would give this cinnamon bread mix five spoons and I am definitely ordering it again.
Tip: If you want to make this a great dessert bread, add a sugar-free Cream Cheese Glaze to it or a Warm Cinnamon Bourbon Syrup topping.
Mix the ingredients together by hand until completely mixed. If the icing isn’t thin enough to spread easily, add a little water until it is the desired consistency. Drizzle over the top of the bread.
In a small saucepan, add the ingredients and stir together well. Heat over medium heat until it thickens. Remove from the heat and spoon over the bread or cinnamon muffins.
Let me know if you try this bread (or the glazes)and how you like them.
Disclaimer: I have not received any promotional items to review and no one from any of the companies whose products I review has asked me to do so. I have purchased the product and am giving my honest opinion about it. Should any company send me a product to try, I will state it up front and will still give my honest opinion.


 The mix goes together easily with the add-ins you need being 3 large eggs, 3 tablespoon soft butter, 1/4 cup sour cream, 1 teaspoon of oil and 2 tablespoons of water. The package has two packets in it; one has the bread mix and the other has the sugar free cinnamon sugar. You also need a 4”x 8” bread pan. This is the smaller loaf pan you usually use for fruit bread rather than the standard-sized loaf pan. To make it, you simply mix the first packet with the bread mix in with all the add-ins and stir, whisk or beat on a very low setting on the mixer to blend it together. Put 1/2 of the batter into the pan and spread it smoothly, then cut open the second pack and sprinkle the cinnamon over the batter evenly. Although it says to put all the cinnamon on this level, I saved some for the top because there is a lot of it.