Tag Archives: Atkins friendly recipes

Chicken Leek Pot Pie Comfort

Last week, a storm system rolled into the Northern Sierra  Mountains and brought downright chilly weather to Reno along with some heavy rains at times.  It was lovely to go from over 100-degree temperatures one day to down in the low 70’s for several days.  But it also called out for a casserole dish or some other kind of comfort food.  So I made this wonderfully delicious chicken with leeks and other vegetables pot pie.   It has a rich creamy sauce with light seasoning that is just great.   I used kohlrabi and Brussels sprouts in the dish, but the vegetables can vary.  Add turnips and green beans or cauliflower and broccoli.  The recipe is versatile.

Chicken Leek Pot Pie

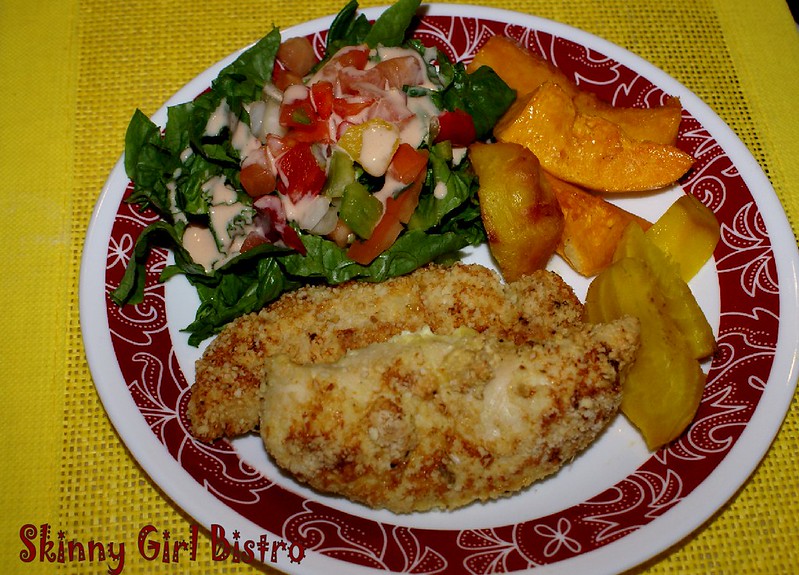
Chicken and leek are just two of the wonderful ingredients in this delicious pot pie.

3/4 lb Chicken Breast
1/2 cup Leek, sliced (white and greens)
1/2 cup Mushrooms, sliced
3/4 cup Kohlrabi, diced and parboiled
1 cup Brussels sprouts, cut into quarters and parboiled
1/2 cup Onions, chopped
1 teaspoon Better than Bullion Chicken
1/2 cup Heavy Whipping Cream or Half and Half
1 teaspoon Seasoning Salt
1/4 teaspoon Black Pepper
1 teaspoon ground Thyme
1 teaspoon ground Sage,
1/2 teaspoon Paprika
2 tablespoons Butter
1 tablespoon Low Carb Flour

Topping
1 cup Low Carb Flour
1/4 cup Heavy Whipping Cream
1/3 cup Water
1 large Egg,
1 teaspoon Garlic powder
1/3 cup Cheddar Cheese, shredded & divided

Preheat oven to 400 degrees (F.) Prepare a 2 to 3-quart baking dish by spraying lightly with cooking spray.

Cut chicken into bite-sized pieces. Cover and set aside.

In a large skillet, melt 1 tablespoon butter over medium heat, then add leeks and onions. Cook until they are just tender. Add chicken and cook until the meat turns white. Push the meat and vegetables to the side, add 1 tablespoon butter and 1 tablespoon low carb flour and stir together to make a paste in the middle. Add the cream, bullion and seasonings. Stir until mixed together, then pull the meat and vegetables back into the sauce. Add the mushrooms, kohlrabi and Brussels sprouts. Turn burner to simmer and cook while you prepare the topping.

In a medium bowl, add the topping ingredients, except 1/2 of the cheese, and mix together. If it is too thick, add a little water. This is like a moist drop biscuit dough so don’t over-mix or add too much liquid.

Pour the chicken filling mix into the prepared baking dish. Use a spoon to drop six large biscuits over the top and use the back of the spoon to spread them to make an almost solid crust over the top.

Bake for 30 minutes or until crust is golden brown. Sprinkle the rest of the cheese over the top and bake another 5 minutes to melt the cheese.

Makes 6 servings

Nutrition Info per serving:
     Calories:318.6 Fat: 22.7 g Net Carbs: 6.2 g Protein: 20.7 g

Give this recipe a try and add your own favorites to it.  Let me know how you like this.  By the way, what is your favorite comfort food for a chilly day?

Simple Summer Dish of Zucchini Frittata

Let’s start the hot days of summer off right with a dish that is quick and easy to make for breakfast, lunch or supper.  Frittatas are very versatile.  Zucchini is a summer squash, but really, it’s available year round. It works well with eggs and sausage in this delicious frittata. Basically, a frittata is an Italian flat omelet that is either finished off by cooking on the stovetop with a cover over the pan to bake it or placing it in the oven to bake.   I used a lid over the skillet for this version.  They are easy and very tasty.  For a crisp top on the frittata, put it under the broiler for about 5 minutes.

Zucchini Sausage Frittata

By Rene Averett

3/4 cup Zucchini – sliced 1/8″ thick
1/4 lb. Italian Sausage, pork
2 tablespoons Sweet peppers, chopped
2 to 3 large Eggs
1 tablespoon Heavy Whipping Cream
1 teaspoon Coconut Oil or Olive Oil
1/4 cup Mozzarella Cheese, shredded
1/4 teaspoon Seasoning Salt
1/8 teaspoon Black Pepper
1/4 cup fresh Kale, chopped

Break the sausage into small pieces and cook in a 6″ skillet until lightly browned. Turn off heat or remove from heat source. Remove to a paper towel to drain.

Add oil to the skillet and arrange the zucchini slices into a circle around the pan, overlapping where necessary to fill the pan. Sprinkle salt and pepper on top.

In a small bowl, beat eggs, cream, sweet peppers and kale together. Add a bit of water if it is too thick. Return the pan with the zucchini to the stove and cook over medium heat until the zucchini begins to look translucent. Add the egg mixture, pouring over the zucchini to distribute the vegetables as evenly as possible. Distribute the sausage on top.

Let cook a few minutes until the egg is set and the edges are bubbly. Put a lid or an inverted pan over the top to keep the heat in. This will begin to cook the top of the frittata. After three or four minutes, remove the lid and sprinkle the cheese over the top. Return the lid and cook another three or four minutes until the egg is completely set and the cheese is melted.

Carefully turn the frittata out onto a plate by putting the plate on top of the pan then flipping the two together. Cut the frittata in half and serve. Makes two servings.

Half of the frittata with 1/3 cup of pasta sauce on top.

If you wish, you can add a low carb pasta sauce on top of the frittata and warm it in the microwave for 30 seconds. (You can also microwave it if the frittata isn’t done enough to your liking.)  This is a versatile recipe and you can swap out meats and vegetables as you like.

Nutrition Info per 1 serving
Calories: 320 Fat: 24.6 g Net Carbs: 3.9 g Protein: 18.4 g

Cool 4th with Frozen Strawberry Yogurt

With the 4th of July holiday coming up this weekend, I am looking for some of the great food that I enjoyed as a kid. One of the key items from my childhood was making homemade ice cream. My brother and I shared the job of churning the ice cream and it was the old turning-the-handle method, not an electric motor doing it. We’d sit out in the back under the shade of a tree and turn it for what seemed like hours, but really wasn’t that long. When it got tough to turn, the ice cream would go into the freezer to cure. That was the best tasting ice cream ever. But things change.

Now ice cream is a rare luxury and I look for low carb ice cream. In my area, I can find vanilla Breyers Carb Smart, which is soft, creamy and has a wonderful flavor. For a while, Wal-Mart carried the chocolate Carb Smart also, but I haven’t found it recently. They also make ice cream bars.  A 1/2 cup serving of Carb Smart is 4 net carbs, so it can work easily into a strict low carb lifestyle. There are a few other brands that have ice cream that is lower in carbs, but not as low as CarbSmart. Check out your grocery store if you are looking for pre-made ice creams and be sure to look at the net carbs.

The drawback is that the flavors available are vanilla and chocolate. You can use the vanilla as a base and add other ingredients to it to create additional ice cream flavors. Or you can make your own.

Recently, we acquired a Cuisinart Soft Service Ice Cream maker and I started experimenting with it. One of the first ice creams I made was Strawberry Yogurt Ice Cream. What could be better for red in the red, white and blue for the 4th of July? So here’s the recipe. If you don’t have an ice cream maker, I’m including the instructions to make it without one.

Strawberry Frozen Yogurt

12 oz (2 containers) Kroger Carbmaster Strawberry Yogurt           or Oikos Plain Greek Yogurt
1 – 1/2 cups Strawberries, fresh or frozen
1/2 cup Heavy Whipping Cream
1/2 cup cold Water
1/2 cup Sugar Substitute
1 teaspoon Strawberry Extract
1/2 teaspoon Vanilla

Put strawberries and sugar into the food processor and pulse until the ingredients are smooth and blended together. Add heavy cream, extracts, yogurt and cold water. Refrigerate for 30 minutes or until ready to make the ice cream.

Turn on the ice cream maker and pour in the ingredients. Allow to mix for 12 to 15 minutes before checking for consistency. If it isn’t frozen enough, let it freeze another 5 minutes and check again. Repeat until it is the desired consistency. Remove ice cream from the freezer bowl and put into a container with a tight lid, placing plastic wrap over the top of the ice cream to prevent freezer burn.

Freeze for at least 30 minutes. It will harden or cure into a harder ice cream. Serve and put any leftovers back in the freezer.  To serve the next time, remove about fifteen minutes before serving to allow to soften. This gets very hard.

Makes 10 servings.

Nutrition Info per serving (Plain yogurt will be a little higher in carbs.)
Calories: 144.2 Fat: 13.5 g Net Carbs: 3.4 g Protein: 2.4 g

To make without an ice cream maker, maker the mixture up as above, then pour it into a 2 to 3-quart glass pan, cover with plastic wrap and freeze until it is almost solid. This will vary with your freezer and the depth of the pan. Check it on every hour. Pour or spoon the almost frozen mixture into a blender or food processor and mix until it is creamy and thick. Pour back into the glass dish or into a container with a lid and freeze for at least four hours. It should be solid and will have to thaw a little before serving.

Looking for a potato salad substitute for summer picnics, try this Texas-Style Turnip Cauliflower Salad.

Texas Style in Deviled Eggs

Texas Deviled Eggs - Skinny Girl Bistro

My grandmother, a third-generation Texan, and my mother made the best deviled eggs I’ve ever had. When I moved away from home, I discovered not everyone made their deviled eggs the same way. Then I found that PK’s mother was from East Texas and made her eggs almost the same way, but didn’t include bacon. For this reason, I’ve dubbed these Texas Deviled Eggs since the sweet deviled egg seems to come from that part of the country. When I take them to parties, people usually want the recipe.

Eggs are great on a low carb lifestyle because they are so low in carbs and it takes your body a long time to digest them, which keeps you satisfied for a while. These deviled eggs are wonderful to take on picnics or to 4th of July parties or other summer occasions. Just be sure to keep them in the cooler (with ice) until you’re ready to eat.

I’ve adapted these ever so slightly for low carb, mainly using sugar-free sweet pickle relish or sugar-free sweet pickles in them. If you can’t find the relish, look for the sugar-free sweet pickles and chop them finely in a chopper or food processor.

Texas Deviled Eggs

7 hard-boiled eggs, peeled (See Tip)
2 to 3 tablespoons mayonnaise
1 teaspoon mustard (or more to taste)
1 1/2 tablespoons sweet pickle relish (sugar-free)
3 pieces of bacon, fried and broken into pieces or use Hormel bacon pieces
1/2 teaspoon salt
1/4 teaspoon pepper
Paprika to sprinkle on the tops

Cut 6 eggs in half and scoop the yolk into a bowl. Set the whites on a plate to be filled later.  Cut up the last egg and add to the bowl. This will be the filling and the extra egg ensures a mound of filling on each half. Mash the filling with a fork until it is completely crushed and mixed together. Add the mayonnaise, mustard and pickle relish. Be sure to get the juice in it. Mix together, then stir in the bacon bits.  If the mixture is too dry, add a little more mayonnaise.  Add salt and pepper and mix it in.

Put a mound of filling in the center of each egg white half so that it completely fills it and spreads over the top. It may help to use your spoon to make four even sections of the filling, then use 1/3 of each section to fill the egg whites. Sprinkle paprika over the top for a light dusting of red, then place on serving plate, cover with plastic wrap and put in the refrigerator until ready to serve.

Makes 1 dozen egg halves. Serves six – 2 egg halves per serving

Nutrition Info per serving
     Calories: 133.5 Fat:10.5 g Net Carbs: 0.5 g Protein: 8.2 g

Tip:  Getting decent-looking eggs after boiling is sometimes a challenge.  There is some truth to not using really fresh eggs for this.  I try to plan ahead to allow at least a week for the eggs to sit in the refrigerator.  This makes it easier for the membrane to separate from the egg.  I put cold eggs in a pan of cold water to cover, then put on the heat and bring to a boil over medium-high heat.  Turn down and cook another 5 minutes, then turn the water off.  Let the eggs sit another 5 to 10 minutes, then run cold water over the eggs.  You can add ice to help chill them quicker.  Break the egg shells in several places and carefully peel part of the shell away and lift the membrane away from the egg if it doesn’t come free with the shell.  Put the egg back in the cold water, then peel the rest of the egg while trying to pull the membrane away from the egg gently.  If this is too much work for you, purchase pre-peeled eggs at the grocery store. They cost almost double but are worth it if you’re in a hurry.

Guilt-Free Chicken Tenders

For everyone who loves chicken tenders, like me, but can’t have all the carbs in traditional breading, this is an alternate version I came up with based on the Betty Crocker recipe. It’s easy, not fried and uses low carb almond flour for the breading.  They taste wonderful, although not like a breaded one or an over-breaded one, in some cases.  The chicken is juicy and the flavor comes through beautifully.  This recipe makes 2 large servings or 3 to 4 smaller ones.  I found two of the tenders with the vegetables to be a very filling meal, but a  bigger appetite would probably want at least three of these.

Oven Baked Chicken Tenders

2 tablespoons low carb Flour (any fine mill type)*
1 Egg
1 tablespoon Water
1/2 cup Almond Flour or Ground Almonds
1/4 cup grated Parmesan cheese
1/2 lb Chicken Breast Tenders

Favorite dipping sauce, if desired

* Carbolose, CarbQuick, coconut flour, Bob’s Red Mill Baking Mix, LC Foods or any others.  You could possibly even use almond flour for the initial dredge as well as the final one. 

Preheat the oven to 425 degrees (F.) Prepare a baking pan with a piece of aluminum foil sprayed with baking spray.

Rinse the chicken tenders and dry with a paper towel. In a small bowl or saucer, put the low carb flour. In a small bowl, add the egg and water and beat until frothy. In another shallow bowl, add the almond flour, Parmesan cheese, salt, pepper and a garlic powder.

Lightly dredge a chicken tender through the plain flour, then dip in the egg mixture, then coat it on both sides in the almond flour. Put on the prepared baking pan. Repeat with the remaining chicken tenders. You should have about eight of them. Spray the top with butter-flavored cooking spray.

Bake for about 40 to 50 minutes until golden brown and no cloudy juices run out. Let sit a few minutes, then serve. Wonderful side dishes with it are roasted golden beets and butternut squash, as pictured, or celery root or kohlrabi fries or creamed cauliflower. A salad is a colorful additional also.

You can serve with a low carb ranch dressing or chipotle dressing or the honey mustard dressing below.

Makes 4 servings or 2 large servings.

Nutrition Info for 1 servings (based on 2)
Calories: 257 Fat: 11.7 g  Net Carbs: 2.3 g Protein: 35.3 g

Honey Mustard Dressing

1 teaspoon sugar-free Honey
1 tablespoon Dijon Mustard
3 tablespoons Mayonnaise

Mix all ingredients in a small bowl until completely blended. No carbs in this recipe!

Tip: If you can’t find sugar free honey – it can be ordered online at Netrition.com- then regular honey can be used. It will add 2.9 g of carbs to each serving.

If you try this recipe, please let me know how you like it or post any questions or suggestions you might have.