Tag Archives: beef

Pizza in a Skillet

A couple of weeks ago, I posted a link to a Crock pot Pizza recipe from Your Lighter Side on my Facebook page. While I haven’t tried the crock pot version, I did go for the pan version and made adjustments for my preferences. I used a  square copper skillet that can go from stove top to oven to make mine, but you can also use a large cast iron skillet or build your pizza in any large casserole dish. Then it is baked.

Here’s a trick though. If you use a large skillet-at least 9 to 10 inch round or square skillet-to make it, you can turn the heat down on the stove to a simmer, put the top or tent with foil over the pan and cook it on the stove top for about 30 minutes. The cheese won’t brown, but the ingredients will cook and the cheese will melt into it.

Most of the ingredients in this can be swapped with other preferred items such as artichoke hearts, pepperoni, anchovies, or whatever you like on your pizza. Don’t eat meat? Simply omit and add more vegetables like cubed eggplant, zucchini, Brussels sprouts, or whatever. Pizza, even in a skillet, is versatile.

Pizza in a Skillet

1/2 pound Ground Beef
1/2 pound Italian Sausage
1/2 cup sliced Mushrooms
1/4 cup sliced Bell Peppers or Mini-Peppers
1/2 cup diced Onions
1-1/2 cups Cauliflower, riced
2 cups Mozzarella Cheese, shredded
1 teaspoon minced Garlic
1 cup Pasta Sauce of choice (look for low carb)
2 cups fresh Spinach

I used Pumpkin Chipotle Pasta Sauce from my local Raley’s brand but you can use whichever pasta sauce you prefer. The nutrition information is based on a Vodka Pasta Sauce.

Preheat oven to 30 degrees (F.).

Put the cauliflower into a food processor and process until riced. Add 1 cup of the mozzarella and pulse until it is chopped and mixed into the rice. In a large and deep ovenproof skillet, such as a copper or cast iron one, press the cauliflower and cheese mixture into the bottom of the pan. Bake for 10 to 15 minutes until lightly browned. Remove from oven and set aside to cool.

In a large skillet, cook the ground beef and sausage until almost done. Remove to a bowl, but leave the oils. Add the onions and garlic to the pan and saute until onion is tender. Add to the ground beef and sausage and mix together.

In the deep pan with the cauliflower crust, spread 1/3 of the pasta sauce on the bottom, top with 1/2 the spinach leaves making a mostly solid layer of greens. Add 1/2 the meat mixture on top, then sprinkle 1/2 the mushrooms, peppers, and olives on top of that. Sprinkle 1/3 cup of mozzarella on top. Add another layer of spinach leaves followed by the rest of the meat mixture, mushrooms, peppers, and olives and sprinkle the rest of the cheese over the top.

Tent with foil and bake for 40 minutes. Remove foil and bake another 10 minutes to lightly brown the cheese. Let sit about 10 minutes to set up, then serve.

The bottom crust will not be firm enough to lift to eat, so this will require forks.

Makes 6 to 8 servings.

Nutrition Information per servings (6 servings):
Calories: 394 Fat: 26.9 g Net Carbs: 9.8 g Protein: 25.2 g

Nutrition Information per servings (8 servings):
Calories: 295.5 Fat: 20.1 g Net Carbs: 7.3 g Protein: 18.9 g

Have fun making your own variation on this pizza and let me know how you like it.

Induction Eating Plan Day 6

So, I’m up to day 6 of the plan and I think it’s going very well. I can’t tell you if I’ve lost weight, but I feel better and my clothes are a little looser. I didn’t weigh at the start and won’t weigh in at the doctor’s office until August, so it will be a surprise if I’ve dropped a few pounds. But I think the fit of my jeans will give me a pretty good clue before then.

Here’s the eating plan for this day:

6/11/2017 Food Net Carb
Breakfast Flax Waffle 0.6
1 slice Bacon 0
Butter 0
Syrup 0
Tea 0
B12 Gummie 1
Lunch Roast Beef Rollup 4.4
Hard Boiled Egg 0.4
Snack Chocolate 1
Dinner Chile Verde 4
1/2 cup Riced Cauliflower 2
Coleslaw 1.8
Tortilla 3
TOTAL CARBS 18.2

Look at the first breakfast item and go bananas! A waffle on an induction period? Who ever heard of that? I can tell you that when I went on Atkins a few years ago, no kind of bread entered the picture and even longer back, the choices were extremely limited.

But now, with the newer approach, many more food are okay on induction. The reason this one works is that it’s made with flax meal rather than flour. While flax is a grain, it’s a marvelous one that has as much fiber in it as it has carbohydrates, so basically, it cancels itself out on the carb meter. Not everyone is a fan of flax meal and it can have some effect on your digestive system similar to a laxative, but I can say the golden flax is delicious and it does help regularity.

I really like this waffle and flax breads are okay in my book. But that is up to you to decide. If you don’t like it, hang in there. Almond flour waffles aren’t too many days away.

Fluffy Flax Waffles

Atkins recipe

I made a couple of minor changes in this. Atkins called for coconut milk and I didn’t want to open a 4 cup container for 1 tablespoon, so I sub’d in cream. I also added a little more sugar substitute. I barely had enough batter to fill my waffle iron, so next time I make it, I may add 1 more tablespoon of the protein powder. It also called for a pinch of salt, but if you use baking powder, there is enough salt in that. I am not sure what baking powder does in this recipe as I don’t think it reacts with the ingredients. Next time I make it, I will make it without the baking powder and see if changes anything.

1 tablespoon Coconut Milk or 1/2 tablespoon Cream plus 1/2 tablespoon Water
1 Egg
1/2 tablespoon Vegetable Oil
1/2 teaspoon Vanilla Extract
1/4 cup Golden Flax Meal
1 tablespoon Vanilla Whey Protein Powder
1/2 teaspoon Baking Powder
1 tablespoon Sugar Substitute*
1/8 teaspoon Nutmeg

Preheat the waffle iron.

In a small bowl, use a whisk to mix the milk or cream and water with the egg, oil, and vanilla extract until blended. Add the rest of the ingredients and mix well.

Spray the waffle iron with baking spray or rub a little oil on the griddles to prevent sticking. Pour the mixture into the middle of the iron and spread it around with a spatula to make sure each well is coated.

Cook for two minutes until the steam from the iron is almost gone. If the lid lifts without resistance, then the waffle is done. If not cook about 10 seconds longer. The lid will lift easily when it’s done.

Cut the waffle in two and serve with butter and sugar-free syrup. I used Mrs. Butterworth’s, but there are several brands available.

Makes 2 servings.

Nutrition information per serving:
Calories: 176 Fat: 15.4 g Net Carbs: 0.6 g Protein: 6.3 g

* Use liquid sucralose or Xylitol or other sugar alcohol to avoid any carbs from the sweetener. The granulated variety has up to 1 net carb in the substance used to carry the sweetener.

Roast Beef Roll-up

I was so full from that waffle that I didn’t want a big lunch. I settled on a simple roast beef lettuce roll. This is easy to make and very satisfying. To add a little more protein, I also added a hard boiled egg. The meat and cheese can vary with your own preferences.

1 slice Colby Jack Cheese
1 thick sliced piece of Roast Beef (about 2 oz.)
1 tablespoon Philadelphia Chive & Onion Cream cheese Spread
1 slice Tomatoes – thinly sliced
1 leaf Romaine Lettuce
1 tablespoon Mayonnaise

Place lettuce on the plate, then put the roast beef on top and spread the cream cheese spread over the top. Put the cheese on top of that, then the sliced tomato. Put whole packet across a large leaf of lettuce, then roll from the narrow end to the larger end in a loose roll. Put face down on the plate. Use a toothpick to hold it together if needed.

Makes one roll.

Nutrition Information per roll:
Calories: 289 Fat: 23.1 Net Carbs: 4.4 g Protein: 16.3 g

Dinner was leftovers from Day 2, the Chile Verde Casserole. If you didn’t have leftovers, then here’s another option for a tasty dinner that is easy to make and induction-friendly. Try this delicious Salisbury Steak (that’s another name for hamburger steak.)

Cheesesteak Casserole Variant

I am all about making food that tastes good and satisfies the palate and is pretty easy to make while still staying in the low carb zone. I have a recipe for stuffed bell pepper Philly Cheesesteak made with purchased roast beef.  Easy to make, but I thought it could be simplified even more and be easier to eat . So I came up with this casserole version that is absolutely delicious. I could eat this once a week and be happy.   This is prepared in a skillet and if you have a cast iron or other oven-ready skillet, then it can go from the stovetop to the oven.  Otherwise, you can put it in a deep dish pie pan or a casserole dish.

All the flavors of the cheesesteak are in this dish, except the bread. You could make a low carb pie crust if you wish and that would add about 2 net carbs to the total count. You can also vary this by using ham or chicken in place of the roast beef and it will still be awesome. I used smoky sharp cheddar slices on top and mozzarella in the mix, but you can use whatever cheese you prefer. You can also use thinly sliced steak for an different flavor.

Cheesesteak Style Casserole

8 oz. Thinly Sliced Roast Beef, ham, or chicken
6 Slices Sharp Cheddar Cheese
1 cup Cheddar or Mozzarella Cheese, grated
2 Large Bell Peppers
1 Medium Sweet Onion – Sliced
6 oz. Mushrooms – Sliced
2 Tbs. Butter
2 Tbs. Olive Oil
1 Tbs. Garlic – Minced
Salt and Pepper – to taste

Preheat oven to 385 degrees (F.) Spray a pie pan or casserole dish with cooking spray or use a stove-to-oven skillet.

Cut bell peppers into strips or pieces. Slice onions. Cut roast beef, ham, or turkey into strips.

Add olive oil to a large skillet and heat. Add onions, peppers, and garlic. Sauté until peppers are softened. Add mushrooms and stir in then cook a few more minutes. Add salt and pepper, then add meat strips. Stir together and continue to cook another five minutes. Remove from heat and stir in the shredded cheese.

Pour the meat mixture into the casserole pan if you’re using one.  Smooth with a large spoon to evenly distribute the mixture. Top with the sharp cheddar cheese. Bake for 20 minutes or until the top is golden brown.

Makes 4 servings.

Nutrition Information per serving:
Calories: 355 Fat: 26.7 g Net Carbs: 8.5 g Protein: 20.7 g

Iceberg is Ideal for Salads

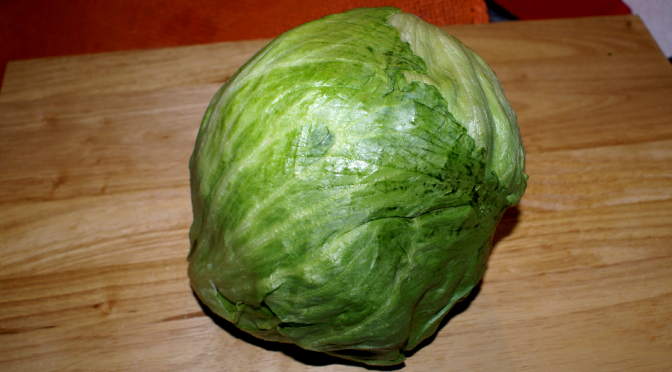
Really, it is. Oh, sure, there are those that criticize, saying that it lacks in any real nutritional value and maybe there is truth to that. But Iceberg Lettuce has a clean, refreshing taste and keeps pretty well in your refrigerator for at least a week, which some other lettuces don’t do as well. Although it’s low in nutrition, it is only a little below Romaine lettuce, which is my other favorite lettuce. The Iceberg lettuce is largely water, but it has a sweet, clean taste where some of the other, more nutritious lettuces, can be a bit bitter and not as refreshing. The ideal, in my opinion, is a mix of the lettuces for variety.

Iceberg lettuce is the one you find most frequently in restaurant salads. The lettuce is also great on sandwiches or for making lettuce wraps because of its nicely cupped, large leaves. It is the primary lettuce used in the United States.

Lettuce Origins

All lettuces trace back to the Mediterranean area where lettuce was first cultivated for its leaves in ancient Egypt, with evidence of that dating to about 2680 BC. Originally, it was grown for the oil produced from its seeds. The Egyptians considered it the sacred plant of Min, their god of reproduction. The cultivated variety appeared to be about 30 inches tall and resembled a larger version of the modern romaine lettuce. The Egyptians passed the seeds along to the Greeks, who then shared with Romans and more varieties were developed. Writings by Joachim Camerarius in 1586 described the three basic varieties of modern lettuce, which are loose leaf, romaine and head lettuce, such as iceberg and butter.

Christopher Columbus brought the lettuce to America in the late 15th century. Meanwhile, more varieties were being developed in Europe. Many of these are still grown in gardens today. I grew a mixture of lettuce a couple of years ago, but pulling leaf by leaf didn’t seem very rewarding. I grew a butter lettuce last summer and that was good, but you only get one head per plant, although after I harvested it, the plant did continue to produce leaves. In the late 19th century, documentation indicates between 65 and 140 distinct varieties.

Because lettuce has a relatively short life span once it is harvested, it didn’t expand into wide spread use until the 1900’s when packing, storage and shipping technology improved. To ship the fresh vegetable long distances,in the 1920’s, crisp head lettuce was shipped in train cars, filled with crushed ice to keep the lettuce chilled. The crisp head lettuce shipped this way came to be known as iceberg lettuce since the ice resembled icebergs. Incidentally, prior to the advent of ice-making facilities, ice used to be harvested in the Sierra Nevada mountains near Donner lake and brought down by train to Sacramento for shipping fresh produce. In the 1950’s vacuum cooling revolutionized the industry. This allowed the lettuce to be cooled and packed in the field, which kept it fresher to market.

Lettuce Uses

Around 50 AD, the Romans cooked and served lettuce with an oil and vinegar dressing, although they sometimes ate them raw. Between 81 and 96 AD, the lettuce salad prior to a meal became a tradition. In China, salads were made primarily from cooked vegetables and the lettuce was worked into all kinds of dishes from wraps to stir-frys and in other meat dishes along the way. Now days, we use lettuce in salads, wraps, sandwiches, and other ways and occasionally still cook it.

Personally, I haven’t tried cooking iceberg lettuce, although some of the loose-leaf varieties seem like they would go well in a skillet of greens. However, I did find a recipe from OceanMist for Fire Charred Iceberg Salad. This just might tempt me to try it. If you do it first, report back, please.

Nutrition Information for iceberg lettuce – 1 cup
Calories:10 Fat: 0 g Net Carbs: 1 g Protein: 1 g

Here are a couple of my quick and easy recipes for lettuce cups, which are really great for a low carb lifestyle.

Taco Lettuce Cups

4 large leaves Iceberg or Butter lettuce
1/2 lb Ground Beef
1/4 lb Chorizo
1 tablespoon Taco Seasoning
1/4 cup Pico de Gallo
1/2 cup chopped Baby Corn
2 tablespoons Black Beans
1/4 cup Butternut or Acorn Squash, cubed
1/4 cup Salsa
1/2 cup Cheddar Jack Cheese, shredded
1 small Avocado

Precook squash in the microwave or in a suacepan with a little water until it is fork tender. Cut into samller pieces.

Cook ground beef and chorizo in a skillet until lightly browned. Add taco seasoning, squash and a little water to make a moist filling. Stir in the baby corn and beans. Cook about three to five minutes to heat the corn and beans.

Put the lettuce leaf on a salad plate, spoon 1/4 of the ground meat on it, then top with Pico de Gallo and 1 tablespoon of Salsa. Add about two tablespoons of jack cheese over the top, and crown with slices of avocado. Fold the lettuce over and serve with sour cream.

Makes 4 tacos.

Nutrition Info per taco:
Calories: 424.8 Fat: 33.3 g Net Carbs:6.1 g Protein: 22.3 g

All comments relevant to my posts are welcome. SPAM is not.  If the post has nothing to do with my site content, it will not be posted.

Information for this article was helped by these pages:  Wikipedia, About Health, Livestrong.com and Oceanmist.com

All photos are by R. Averett, Copyright Skinny Girl Bistro