Tag Archives: Cinco de Mayo

It’s just around the corner…

Hola! That’s right Cinco de Mayo is coming!

Usually, I wait until the last minute to post a  new recipe, but I decide to get a bit ahead this month.  Mexican food is so full of spice and flavor that it’s hard to narrow down a favorite choice for celebrating. I’ll add a few links for previously posted dishes that could tempt you, or you can try the one I’m posting today.

Also, I’d like to remind you I have a Low Carb 15 Mexican Food recipe eBook that is currently on sale for just about any reader. It will be just 99 cents until May 6th.  It has 15 (actually 16) recipes to celebrate Mexican Food any time you want. Just ’cause you’re on a Keto or low carb diet doesn’t mean you can’t enjoy the wonderful flavors. In fact, with more and more products being developed for Keto, the choices are growing. I just picked up low carb tortillas from La Tortilla Factory that are zero carb! Don’t ask me how they do it; I am just thrilled to see it! And they taste pretty good.

Now on to the recipes. First up is a Chile Rellano Casserole. When you want something quick to make, this can come together in about 20 minutes with an addition 40 to 45 minute bake time. If you start with canned chiles, it’s really easy. And it is super low-carb. For the low carb flour, I used Dixie Carb Counters All Purpose Flour, but you can use Carbquik or even coconut flour (use 1/2 tablespoon).

Chile Rellano at the front.

Chile Rellano Casserole

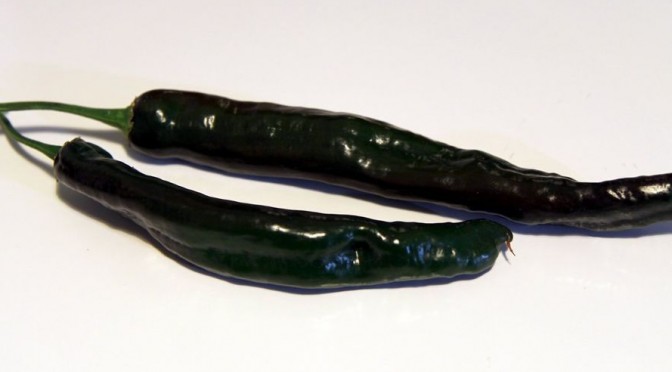
2 (4 ounce) cans chopped green chiles or 6 to 7 whole Poblano or Anaheim chiles
8 ounces Mexican mix Cheese
1 large egg
1/2 cup Almond Milk or 1/4 cup Heavy Cream and 1/4 cup Water
1 tablespoons All-purpose Low carb Flour
4 oz Tomato Sauce or chopped Tomatoes, blended
1/2 cup Ricotta Cheese
1 tablespoon Flaked Onions, dehydrated or 1 quarter cup chopped Onion.
1 cup Diced Chicken (optional)
1/4 teaspoon Salt
1 tablespoon Herb and Garlic seasoning

Preheat the oven to 350 degrees F (175 degrees C). Grease an 8×8-inch baking dish with cooking spray or butter.

If using chopped chiles:
In a large bowl, add eggs, milk, and flour and whisk together. Then add chiles, ricotta cheese, seasoning, and flaked onions. Whisk together until blended. Add chiles, chicken, and 1/2 of the cheese and stir to mix.

Pour the mixture into the baking dish and spread evenly. Sprinkle cheese on top.

If using whole chiles:
If you’re using canned whole chiles, go to the next step. If you’re cleaning fresh chiles, place about six chiles under the broiler and cook until they are charred. Flip them over to get both sides. Place in cold water to loosen the charred skin. Use a paring knife to get the skin loosened and remove it. Cut the stems off, then slice open and remove the seeds and any membrane (ridges) inside unless you want them very spicy.

Lay half the chiles in the baking pan’s bottom, sprinkle 1/4 of the cheese over the top, then lay the other half on top and sprinkle with more cheese.

In a large bowl, add eggs, milk, and flour and whisk together. Then add ricotta cheese, seasonings, and flaked or chopped onions. Whisk together until blended. Add chiles, chicken and 1/4 of the cheese and stir to mix. Pour over the chiles.

Bake in the preheated oven for 25 to 30 minutes until it is set. Pour tomato sauce evenly over the top; continue baking for 15 more minutes.

Turn broiler on. Sprinkle top with remaining cheese. Place under the broiler until cheese is melted, 2 to 3 minutes.

Let cool about 5 minutes before serving. Serves 4.

Casserole Nutrition Information

Since you save so many carbs with the main course, you have enough for a tasty side dish. This Spanish rice is made with riced Natural Heaven Hearts of Palm . You can also use the canned riced hearts of palm. Failing that, I do have a cauliflower rice version here.  This is a low carb variation on my grandmother’s recipe, so it’s more Tex-Mex than Mexico, but I love it.

I’ll just mention that Natural Heaven sells a pre-made Southwest Rice with beans and corn.  It’s okay, although a little higher in carbs.  I tried it and I think it has a vinegar taste to it, but if you’d like to try it, you can order it from Amazon.

Hearts of Palm Spanish Rice

Palm Spanish Rice

1 package Natural Heaven Hearts of Palm White Rice
OR 1 can Hearts of Palm Rice
1 8 oz. can Diced Tomatoes with Chile
1/4 cup Diced Onions
1 tablespoon Butter
1 teaspoon Garlic, minced
1 teaspoon Mrs. Dash Spicy Seasoning
1/4 teaspoon Salt
1/2 teaspoon Cayenne Pepper (optional)

In a skillet, add the butter. When melted, add the garlic then stir until it is sizzling. Add the chopped onion and stir for about three minutes until it is fragrant. Add the rice and stir it in for about three minutes.

Add the can of diced tomatoes and chiles and mix it into the skillet until the rice is coated. Add the seasonings and stir. Reduce the heat to a medium simmer and let cook for about 5 minutes.

Makes 4 to 6 servings. The nutrition information is for 4 servings. Six servings are 5.1 net carbs each.

Palm rice Nutrition Information

Other Mexican food recipes you might enjoy are:


Carnitas    

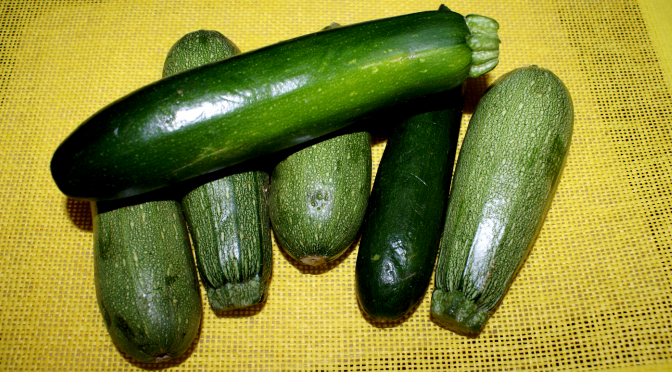
Enchilladas with Chicken and Zucchini

Photo: Cod with Chorizo

Spicy Cod with Chorizo

Easy Flan

Note: Nutrition information is based on the ingredients I used in this recipe and my measurements. They are a close calculation and may be slightly higher or lower. Ingredient substitutions may affect the carb count. Different brands may have other carb counts.

Copyright 2023 by Rene Averett

Delicious Stuffed Mexican-style Chicken Breasts

Photo: Stuffed Mexican Chicken breast and riced turnips with chile

As May starts, we’re only a few days away from Cinco de Mayo, which is a great time to celebrate Mexico and anything Mexican. The cuisine is spicy, bursting with flavor, and a favorite around the world. Just because you can’t go out to your favorite restaurant right now doesn’t mean you can’t have a great celebration at home. Even better, you can make low carb versions so you don’t have to worry about gaining back any hard-lost pounds.

I’m tossing out a shameless plug for my little cookbook that features over fifteen adapted Mexican food recipes. I tried  out and adapted every one of the dishes in the booklet to be under 10 net carbs. It includes my grandmother’s TexMex Spanish rice that I grew up with but adjusted to use cauliflower in place of the rice.  Delicious and flavorful, yet different from the Mexican restaurant version.

You can purchase a copy for only 99-cents from your favorite e-book seller by going to this one link:

https://books2read.com/u/mqzMyO

New Recipes

Now, on to the new recipes. I wanted to make a stuffed chicken breast that would celebrate the flavors of Mexico, so I came up with this delicious filling that gives enough spice to taste it, but not overwhelm the chicken. It’s easy to make and cooks in about thirty minutes, so less than an hour to prepare and have dinner on the table.

To compliment the dish, you can serve cauliflower rice or try the amazingly tasty recipe that follows the chicken dish  for riced turnips with green chiles. It’s so good, you won’t believe you’re eating turnips. They absorb the flavors of the dish and are a great substitute for rice.

Image: Stuffed Mexican Chicken breast

Stuffed Mexican Chicken Breast

2 boneless, skinless chicken breasts
4 ounces Cream Cheese, softened
2 teaspoons Taco Seasoning
1 tablespoons Chopped Green Chiles
1/2 tablespoon Dried Minced Onion
1/3 cup Cheddar Jack Cheese, shredded
1/2 teaspoon Mrs. Dash Southwest Chipotle
2 tablespoons Southwest Style Salsa

In a small bowl, mix together the cream cheese, taco seasoning, chiles, and dried onions until blended and smooth. Add the cheddar jack cheese and mix it well.

Preheat the oven to 375 degrees (F.)

Cut the chicken breasts in the thickest part almost the full length and close to the opposite side to make a pocket. Stuff one-half of the cream cheese mixture into each pocket. Use tooth picks to hold the pockets closed.

Put the chicken in an oven-proof skillet or in a baking dish. Sprinkle the southwest chipotle seasoning on top and rub it in. If you’d like it spicier, add additional. Spray the top with a bit of oil or cooking spray.

Bake for 25 to 30 minutes until the chicken is done. If you poke the thickest part with a fork and the liquid coming out is clear, the chicken is done.

Add a tablespoon of salsa over the top of each breast and serve.

Makes 2 servings.

Photo: Riced Turnips with chile

Riced Turnips with Chile

1 large Turnip, peeled and cut into cubes
1 tablespoon Butter
1 tablespoon Green Chiles, diced
1/4 cup hot Water
1/2 teaspoon Better than Chicken Bullion
1/4 cup Onions, chopped
1/2 teaspoon Mrs. Dash Chipotle Seasoning
1/4 teaspoon Salt

Boil water, pour into a 1/4 cup measure and add the bullion, stirring to dissolve.

Put turnip cubes into a food processor and pulse until it is chopped to the size of rice. In a medium-sized skillet over medium high heat, melt the butter, then add the riced turnips and onions. Sauté for about five minutes, then add the bullion water and stir it in. Reduce heat to a simmer and cook for 15 minutes. Add chiles, salt and seasoning, stir and cook for another 10 minutes until the turnips are tender.

If the water cooks out, add more water. It should be about the same texture as cooked rice. Fluff up the turnips before serving.

Makes two 1/2-cup servings.

Image: Nutrition Stuffed Mexican Chicken Breast


Image: Nutrition Riced Turnips with Chile

Zest for Zucchini

Zucchini is one of the favorite vegetables of the world and it certainly ranks high in my culinary endeavors. It is delicious almost any way you prepare it and there are countless ways to use it in your cooking from salads, to main course to appetizers to desserts and breads. However, zucchini is part of a much larger family that includes other summer squashes, winter squashes, melons and cucumbers. Yep, they are all related, some a little closer than others.

Greenhouses, importers, and various growing locations worldwide have ensured that we can find zucchini in grocery stores at any time of the year. Others in the family, like yellow, crookneck and scallop squashes don’t show up as consistently. They each have their own unique flavor and blend well together when cooked. Zucchini has a delicate flavor, an edible skin, and a creamy off-white flesh. Generally the smaller, 3 to 4-inch vegetables are the best for eating since the seeds are smaller and edible and the flavor is at its best, I think. As they get bigger, they get tougher, seeds are bigger and the flesh isn’t as sweet. If you are stuffing a zucchini, try to look for about 5” and as big around as you can find.

Besides the delicious vegetables — oh, wait, that isn’t really a vegetable, but a fruit! It is formed in the same manner as fruits, so technically it is one of them. But I will continue to count it in the vegetable column. The zucchini also produces an edible golden flower. I admit, I have never cooked one of the flowers, although they are popular fried. I did have a couple of plants one summer that did not cross-pollinate because the flowers were all I got. The male flower blooms first to attract bees and the female blossom, which has the bud of a tiny fruit under it, needs to be pollinated by the bee. If this doesn’t happen, no zucchini will form. I was once told that you need at least two plants, but that apparently, isn’t necessary so long as the plant produces a female blossom. If no bees are in the area, you can transfer some of the pollen using a Q-Tip to dip into the male flower and put it in the center of the female bloom. Doesn’t that sound romantic?

All squashes have their ancestry in the Americas, but they have spread around the world. They are easy to grow and mature quickly. It’s one of the few plants that I can actually get a decent crop from in the micro-climate of South Reno. Native Americans called squashes one of the “three sisters” in their culture. The other two were corn and beans, which are also native to the Americas. The squash blossom is a popular design motif in Native American art and jewelry.

The squash we now call zucchini was developed in Italy from the root squashes brought back from America. It was cultivated,  in the late 19th century and likely near Milan. The name came from zucca, which is the Italian word for pumpkin or squash and the suffix “ino” or “ina”, meaning little and becoming zucchini in the plural form. The French called it “Courgette” and it is known that way in much of Europe, so if you see that in a recipe, you know it is zucchini or vice versa. They are known as baby marrow in South Africa.

As little as 30 years ago, the zucchini was barely known in the United States and it was referred to as the Italian squash. It was likely brought to the country of its ancestors by Italian immigrants. But it took hold and has become  popular to eat and grow.

Going back to its roots, zucchini, like all summer squash, is delicious with its other two sisters, corn and beans, and popular in Native American and Mexican foods. While beans and corn are used sparingly in a low carb lifestyle, summer squashes are very low in carbohydrates, which makes them awesome!

Nutrition information 1 medium (196 g)
Calories: 33 Fat: 0.5g Net Carbs: 4.0 g Protein: 2.4 g

Recipes

There are several recipes on this site that feature zucchini:

Bacon & Zucchini Stuffed Sole
Zucchini Fritters
Chicken with Tomatoes & Zucchini
Zucchini and Sausages Bake

Featured Recipe

Since Cinco de Mayo is just around the corner and the squash is a Native American, which includes Mexico and South America, crop, it seems apropos that the recipe should honor that heritage. The Mexican name for squash is calabacitas and the Mexican zucchini is similar to the Italian one but more rounded and tear drop shaped. This is an original recipe I’ve developed over the years.

Calabacitas y Carne Con Queso

Mexican Squash with Meat and Cheese
Recipe by Rene Averett

3 cups Mexican Zucchini (or regular zucchini)
1 lb Beef, ground
1 can Chiles, mild or medium to your preference
1 cup Cheddar Jack Cheese, shredded
1/2 cup Mexican Cheese, Queso Fresco or similar
1/2 cup diced Onions
1 cup canned Diced Tomatoes, with juice
2 Low Carb Tortillas
1 cup Jicama, shredded or cubed or Daikon Radish, chopped
1 clove Garlic, minced
1 tablespoon Olive Oil
1/2 teaspoon ground Cumin
1 teaspoon dried Mexican Oregano
2 tablespoon fresh Cilantro
1 teaspoon Cayenne Pepper

Preheat oven to 350 degrees (F.)

Slice zucchini into 1/4″thick rounds.

In a large skillet over medium heat, add olive oil and heat a minute or so, then add garlic, jicama and onions. Stir cook the onions until they are fragrant and shiny. Add ground beef and lightly brown, then add seasonings, chiles and diced tomatoes. Stir and cook for about 10 minutes until hot and bubbly. Stir in the fresh cilantro.

Spray a round 2 qt. casserole dish with baking spray. Layer 1/3 of the zucchini on the bottom of the dish. Pour 1/3 of the meat mixture over the top, then sprinkle 1/3 cup of cheddar jack cheese over that. Put a tortilla on top and repeat with another layer of zucchini followed by the meat and cheese. Put the second tortilla on top and use the rest of the zucchini, meat and cheese on top of that.

Bake for 25 minutes until the casserole is hot and bubbly. Sprinkle the Mexican cheese over the top and return to the oven for another 5 minutes to melt the cheese.

Makes 6 servings.

Nutrition Info per serving :
Calories: 260 Fat:17.0 g Net Carbs: 8.7 g Protein: 16.3 g

And it’s Z-end of the the A to Z blog challenge! I will resume my usual Tuesday post schedule next week, but I thank everyone who stopped by to visit and comment during the A to Z Challenge. I hope you will continue to visit now and then.


Input for this article came from World’s Healthiest Foods,  Nutrition and You, Wikipedia, and The History of Zucchini.

All photos taken by R. Averett for Skinny Girl Bistro.

Pursuing the Pasilla Pepper Confusion

My mother didn’t cook too often, usually stepping in to make something unusual or different from the standard fare that my grandmother served. Coming from a ranch family, my grandmother focused a lot on basic ranch food, meat and potatoes, chicken and hearty food. Mother liked to bake the unusual breads, the different cultural dishes. One of the things that she did every now and then was to make from-scratch enchilada sauce. I remember her coming home from a trip across the border with a bag filled with dried, very dark chiles. She pour boiling water over these and let them sit until they were soft, then put them through a sieve using a large pestle to mash them forcing out the chile juice and pulp that formed the base for the sauce. I believe that the chiles she used were Pasilla peppers.

When I began looking into the background of these peppers, I found there is a bit of confusion about what exactly a pasilla pepper is. Several sites that sell them and Wikipedia are adamant that pasilla, also called chile negro, are the dried chilaca pepper. This is a long, narrow pepper in the Capsicum annum family. It is very dark, almost a chocolate brown color when dried and I am pretty sure these are the chiles that my mother used for her sauce. Like many chiles, it ranges from mild to a middle of the range hot.

However, it seems the California camp has muddied the culinary waters a bit as grocers and cooks in California call the dried form of the poblano chile a pasilla also. This creates two lines of thinking in regards to what a true pasilla is. A couple of recipes I read even include the ancho chile as pasilla, when an ancho is actually the dried form of the poblano. It’s clear that cooks aren’t certain what pasilla is. The word pasilla, pronounced pa-see-ya, translates to “little raisin”, which more properly describes the dark brown chilaca when it is dried.

348px-Capsicum_annuum_ancho_dried
Ancho chile from the poblano pepper.  Photo from Wikimedia Commons, used with permission – “Capsicum annuum ancho dried” by User:Carstor – Own work. Licensed under CC BY-SA 2.5 via Wikimedia Commons –


220px-Capsicum_annuum_pasilla_dried
Pasilla peppers from the chilaca chile. Photo from Wikimedia Commons, used with permission. “Capsicum annuum pasilla dried” by User:Carstor – Own work. Licensed under CC BY-SA 2.5 via Wikimedia Commons –


For cooking purposes, any dried chile will work to make enchilada sauce. The different chiles used will alter the taste and hotness of the sauce. Commercial chili powder uses a variety of chiles, such as ancho, jalapeno, New Mexico Hatch and pasilla. The chili powder is also excellent in making Tex-Mex Chili or any other kinds of stew chilies. One famous chef uses chili powder as the base for his enchilada sauce, so it can be a simple process to make homemade sauce or you can start from the dried peppers. One thing is pretty certain, it will be thicker and more flavorful than any canned enchilada sauce you buy.

Nutrition Information per 1 oz (28 grams) of pasilla
Calories: 97 Fat: 4.0 g Net Carbs: 6.0 g Protein: 3.0 g

Keep in mind that once pressed to get the liquid and pulp out, the nutrition value may decrease somewhat, but for calculating the recipe, it’s best to count the number of peppers rather than the finished quantity of sauce to be on the safe side.

Recipes:

So far, I haven’t tried making homemade enchilada sauce, but with Cinco de Mayo just around the corner, I am thinking I will give it a try. At least, I’ll make  one beginning with chili powder or possibly one recipe that uses chipotle peppers, which you can buy canned in their sauce. So, I will refer you to a couple of recipes from other sites.

This recipe for Irma’s Red Enchilada Sauce starts with dried pasillas and dried Ancho or New Mexico chiles. If the pasillas are very crisp, they may already be roasted and you don’t need to roast them a second time.

Here’s a picture-by-picture recipe for Homemade sauce on Instructables using California or Hatch chiles.

And this is the Chipotle sauce recipe that is a little simpler.

Coming next month, I will put up a low carb recipe for enchiladas using low carb whole wheat tortillas instead of corn tortillas and homemade enchilada sauce in time for Cinco de Mayo! (That’s the 5th of May celebration for those not familiar with Mexican customs.)

All comments relevant to my posts are welcome. SPAM is not.  If the post has nothing to do with my site content, it will not be posted.

Information for this article came from Wikipedia, Eat More Chiles, and Spices Inc

Top photo of pasillas is from Wiki Commons, used with permission- “Fresh chilaca chilies” by Jonathanischoice – Photographed on my kitchen bench. Licensed under CC BY-SA 3.0 via Wikimedia Commons –