Category Archives: Recipes

Join In on Jicama

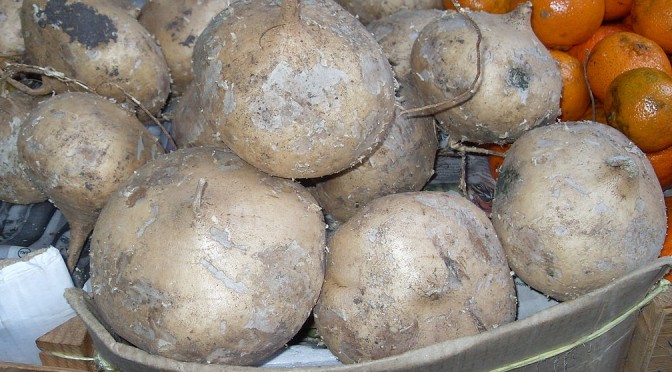
Oddly, even though I grew up adjacent to Mexico and thrived on Mexican food, jicama was something I really didn’t encounter. Not even when I moved to Southern California.  I didn’t “discover” it until about ten years ago when I spotted the odd-looking root in the grocery and decided to try it. What I found was an unusual vegetable that has a crisp, clean flavor and a bit of sweetness. It reminded me of an apple in texture and in crunch.

Most frequently, jicama seems to be cut into small sticks or grated and put into salads and slaws, where it does an admirable job. It can also be cooked, baked, boiled or fried. One of the interesting characteristics is that it doesn’t get soft. It keeps the crispness, which makes it great for a dipping chip, even if you fry it. It adds a bit of crunch to a stew while substituting for a higher carb’d vegetable.

Cultivated South of the Border

Pronounced hee-ca-ma, it is also called yambean, although it is not a yam. Jicama is native to Mexico and South America. It is part of the legume family and grows a vine in tropical and semi-tropical climates. The edible jicama root is a globular shape and has been referred to as Mexican turnip, although the flavor is nothing like a turnip, or Mexican water chestnut, which it resembles in crunch. Other names for it are bengkoang, sengkwang and yacon. The flavor suggest that it would also be good in Asian food as a water chestnut substitute. It is grown in Asia and in other tropical and semi-tropical areas, including Florida, Hawaii and Puerto Rico.

Nutrition Info per 100g (about3.5 oz)
Calories: 38 Fat: 0.19 g Net Carbs: 3.8 g Protein: 0.72 g

Jicama, how do I love thee?

Let me count the ways:

  • Peeled and cut into sticks as a snack.
  • Cut into rounds and fried as a dipper instead of potato chips.
  • Chopped and added to stir-fry.
  • Shredded and added to salad.
  • Cut into sticks and Tampura battered and fried.
  • Sliced and spread with peanut butter and sugar free jam.
  • Sliced and sprinkled with cinnamon and sugar substitute.
  • Sliced and roasted, then topped with cheese and bacon.
  • Sliced and sprinkled with lime juice and a bit of chili powder.
  • Cut into cubes and mixed with strawberries and blueberries in a fruit salad.
  • Or mixed with cantaloupe and honeydew melon in a fruit salad.

There are more ways than I can count to use this versatile vegetable.   If you have other ways you’d like to share, let me know.

Here are two ways to use jicama from this site:

Root Vegetable Fries (on the Celeraic page, go to the bottom)
Sizzlin’ Hot Snacks (toward the bottom, snack options with  beets, daikon and jicama)

And here’s a new recipe for jicama for this entry:

Cinnamon Battered Jicama Sticks

12 Jicama sticks, about 3 to 4” long, 1/2 inch cubed
1/4 cup Low Carb Flour
1 Egg
1/4 teaspoon Baking Powder
1 teaspoon ground Cinnamon
1/2 teaspoon ground Cardamom
2 tablespoons Sugar Substitute
1/4 cup sugar free Raspberry Jam or preferred flavor
Coconut Oil

Mix the flour, egg, baking powder, sugar substitute and spices together to make a batter.

Heat enough coconut oil in a small pan to bring it to about 1/2 inch. Reduce to a medium heat.

Dip a jicama sticks into the batter, then carefully slide into the pan of oil. Cook about three at a time until golden brown, then turn over to cook the other side to golden brown or spoon the oil over the top while cooking to brown the top. This only takes a couple of minutes. Remove to paper towels to drain. Spread with sugar free raspberry or other jam of choice.

Makes 12 snacks.

Nutrition info per snack
   Calories:16 Fat: 0.7 g Net Carbs: 2.0 g Protein: 0.8 g

All comments relevant to my posts are welcome. SPAM is not.  If the post has nothing to do with my site content, it will not be posted.

This article used the following for reference: Specialty ProduceNutrition and You,  Natural Society Newsletter

Top photo from WikiCommons, used with permission – By Wicki (Own work) [Public domain], via Wikimedia Commons

Iceberg is Ideal for Salads

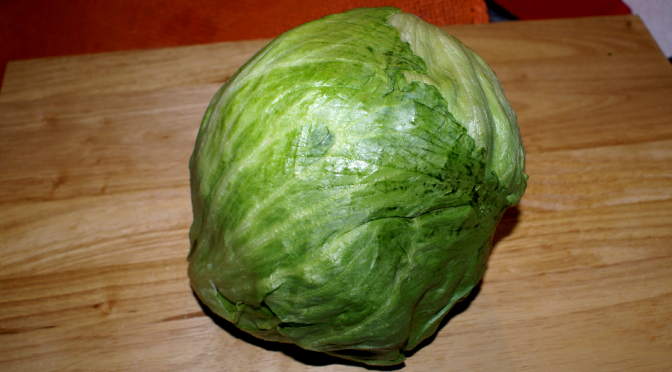
Really, it is. Oh, sure, there are those that criticize, saying that it lacks in any real nutritional value and maybe there is truth to that. But Iceberg Lettuce has a clean, refreshing taste and keeps pretty well in your refrigerator for at least a week, which some other lettuces don’t do as well. Although it’s low in nutrition, it is only a little below Romaine lettuce, which is my other favorite lettuce. The Iceberg lettuce is largely water, but it has a sweet, clean taste where some of the other, more nutritious lettuces, can be a bit bitter and not as refreshing. The ideal, in my opinion, is a mix of the lettuces for variety.

Iceberg lettuce is the one you find most frequently in restaurant salads. The lettuce is also great on sandwiches or for making lettuce wraps because of its nicely cupped, large leaves. It is the primary lettuce used in the United States.

Lettuce Origins

All lettuces trace back to the Mediterranean area where lettuce was first cultivated for its leaves in ancient Egypt, with evidence of that dating to about 2680 BC. Originally, it was grown for the oil produced from its seeds. The Egyptians considered it the sacred plant of Min, their god of reproduction. The cultivated variety appeared to be about 30 inches tall and resembled a larger version of the modern romaine lettuce. The Egyptians passed the seeds along to the Greeks, who then shared with Romans and more varieties were developed. Writings by Joachim Camerarius in 1586 described the three basic varieties of modern lettuce, which are loose leaf, romaine and head lettuce, such as iceberg and butter.

Christopher Columbus brought the lettuce to America in the late 15th century. Meanwhile, more varieties were being developed in Europe. Many of these are still grown in gardens today. I grew a mixture of lettuce a couple of years ago, but pulling leaf by leaf didn’t seem very rewarding. I grew a butter lettuce last summer and that was good, but you only get one head per plant, although after I harvested it, the plant did continue to produce leaves. In the late 19th century, documentation indicates between 65 and 140 distinct varieties.

Because lettuce has a relatively short life span once it is harvested, it didn’t expand into wide spread use until the 1900’s when packing, storage and shipping technology improved. To ship the fresh vegetable long distances,in the 1920’s, crisp head lettuce was shipped in train cars, filled with crushed ice to keep the lettuce chilled. The crisp head lettuce shipped this way came to be known as iceberg lettuce since the ice resembled icebergs. Incidentally, prior to the advent of ice-making facilities, ice used to be harvested in the Sierra Nevada mountains near Donner lake and brought down by train to Sacramento for shipping fresh produce. In the 1950’s vacuum cooling revolutionized the industry. This allowed the lettuce to be cooled and packed in the field, which kept it fresher to market.

Lettuce Uses

Around 50 AD, the Romans cooked and served lettuce with an oil and vinegar dressing, although they sometimes ate them raw. Between 81 and 96 AD, the lettuce salad prior to a meal became a tradition. In China, salads were made primarily from cooked vegetables and the lettuce was worked into all kinds of dishes from wraps to stir-frys and in other meat dishes along the way. Now days, we use lettuce in salads, wraps, sandwiches, and other ways and occasionally still cook it.

Personally, I haven’t tried cooking iceberg lettuce, although some of the loose-leaf varieties seem like they would go well in a skillet of greens. However, I did find a recipe from OceanMist for Fire Charred Iceberg Salad. This just might tempt me to try it. If you do it first, report back, please.

Nutrition Information for iceberg lettuce – 1 cup
Calories:10 Fat: 0 g Net Carbs: 1 g Protein: 1 g

Here are a couple of my quick and easy recipes for lettuce cups, which are really great for a low carb lifestyle.

Taco Lettuce Cups

4 large leaves Iceberg or Butter lettuce
1/2 lb Ground Beef
1/4 lb Chorizo
1 tablespoon Taco Seasoning
1/4 cup Pico de Gallo
1/2 cup chopped Baby Corn
2 tablespoons Black Beans
1/4 cup Butternut or Acorn Squash, cubed
1/4 cup Salsa
1/2 cup Cheddar Jack Cheese, shredded
1 small Avocado

Precook squash in the microwave or in a suacepan with a little water until it is fork tender. Cut into samller pieces.

Cook ground beef and chorizo in a skillet until lightly browned. Add taco seasoning, squash and a little water to make a moist filling. Stir in the baby corn and beans. Cook about three to five minutes to heat the corn and beans.

Put the lettuce leaf on a salad plate, spoon 1/4 of the ground meat on it, then top with Pico de Gallo and 1 tablespoon of Salsa. Add about two tablespoons of jack cheese over the top, and crown with slices of avocado. Fold the lettuce over and serve with sour cream.

Makes 4 tacos.

Nutrition Info per taco:
Calories: 424.8 Fat: 33.3 g Net Carbs:6.1 g Protein: 22.3 g

All comments relevant to my posts are welcome. SPAM is not.  If the post has nothing to do with my site content, it will not be posted.

Information for this article was helped by these pages:  Wikipedia, About Health, Livestrong.com and Oceanmist.com

All photos are by R. Averett, Copyright Skinny Girl Bistro

Fantastic Figs – A Good and Versatile Fruit

Living in West Texas as I was growing up, figs weren’t a common fruit in our grocery stores and most of what I experienced were the ones in a dried fruit platter sent by relatives in California at Christmas. I wasn’t that impressed, leaving them to the rest of the family to eat. When I moved to Los Angeles after graduation, my Aunt Emilie introduced me to canned Kadota figs, which were beautiful and plump with a lovely, fruity taste. We usually ate them for breakfast. Still, figs have never been at the top of my favored fruit list.

Even though Nevada borders on California, I rarely see fresh figs at the grocery stores. When I do, they tend to be a little pricey, but I did pick some up a year ago only to cut them in half and dry them for later use, such was my enthusiasm for actually eating them. But when I chose to put them in this blog, I was reminded of the Kadota figs and how much I enjoyed them.

Health Benefits

When I started researching, I found that figs are extremely nutritious. They’re a good source of potassium, help lower blood pressure, reduce cholesterol, and are a fiber-rich food. Additionally, the leaves are also good for you. In some cultures, they are a regular part of the diet. One of the properties of fig leaves is that they have anti-diabetic properties and can help lower insulin. Fig leaves appear to also lower levels of triglycerides in animals and inhibit the growth of some types of cancer cells.  Research is underway to determine the effectiveness.

History

Figs have a Biblical beginning and certainly the fig leaf played a prominent role in the story telling. They were mentioned in the Bible and other ancient writings. One of the first foods cultivated by man, the edible fig is believed to have originated in Egypt and spread from there to Crete. Around the 9th century BC, they arrived in Greece and became such an important part of the Grecian diet that they passed laws to ensure the best quality ones stayed in Greece. Across the way, the Romans considered the fig a sacred fruit. At least 29 varieties of figs were known at this time.

In the late 19th century, figs were brought to California by Spanish missionaries to San Diego, but the trees were not equal to the quality of those that came from Europe. California horticulture began improving the cultivation and processing techniques in the early part of the 20th century. Now, California is one of the largest producers of figs, rising alongside Turkey, Greece, Portugal and Spain.

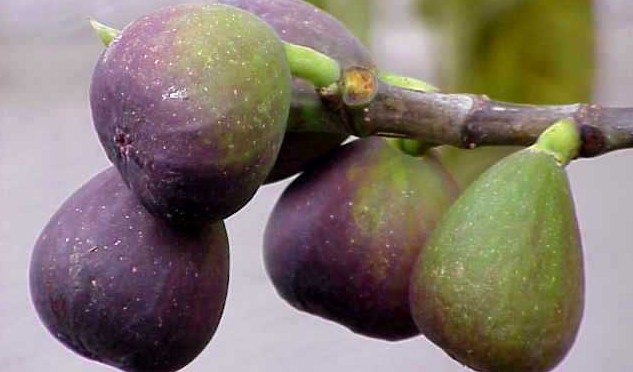
Popular figs in production in California are Brown Turkey Figs, Black Mission Figs, Kadota Figs and Calmyrna Figs. They come to market between mid-May and mid-December. Figs can be used fresh or dried. I dried my figs in a small dryer that I own and put them in a plastic bag to keep in the refrigerator or freezer. They can be reconstituted somewhat if you put them in hot water and let them sit about an hour. From a carbohydrate stand-point, I prefer drying my own fruit so that no additional sugar is added.

Nutrition Information for 1 medium fig (2 1/4 inch inch diameter)
   Calories: 37 Fat: 0.2 g Net Carbs: 8.6 g Protein: 0.4 g

For now, this recipe for scones made with figs is the only recipe on my site that uses them.  That will change when I can get my hands on more figs.  There are many wonderful-sounding recipes at California Figs.

Fig-a-licious Scones

1 cup Low Carb Flour
2 tablespoons Almond Flour
2 tablespoons Vanilla Whey Protein Powder*
1 tablespoon Oat Fiber*
3 tablespoons Sugar Substitute
1/4 teaspoon Salt
1/2 tablespoon Baking Powder
1/4 cup cold Butter
1/2 cup dried Figs, chopped (about five)
1/2 cup slivered Almonds, toasted and chopped
1 large Egg
1/2 teaspoon Vanilla extract
1/4 cup Buttermilk

* Vanilla Whey Powder and Oat Fiber are optional ingredients. The recipe will work perfectly fine if you use the equivalent amount of the other flours to replace them. They add texture and more fiber but are not necessary.

Chop the dried figs into small pieces. After I softened them and was able to cut them with a knife, I put them in my small food chopper and chop them to little bits. Toast the slivered almonds in a small skillet over medium heat, stirring until they just start to brown. Set aside for now.

In a medium bowl, mix together the flours, protein powder, oat fiber, sugar, salt and baking powder. In a small bowl or cup, add the egg, vanilla extract and buttermilk and beat together. Cut the cold butter into little pieces and add to the flour. Use a pastry cutter or your clean or gloved fingers to mix the butter into the flour until it resembles little crumbs. Add the egg and milk and mix together with a spoon until the flour is completely mixed in. Then add the chopped figs and almond and mix completely through the dough.

Prepare a baking pan with parchment paper or a silicone baking mat. Sprinkle a tablespoon of low carb flour on the pan, then turn the scone dough onto the paper or mat. Pull it together, kneading a few times, then shape it into a 6 or 7 inch round. Using a sharp knife, cut a score line across the middle, then score three slices on each side of the middle line. If you wish, you can cut all the way though and separate by easing each section out a little to allow them to bake with a crust on all sides. I left mine scored so the inside cuts are not crusted.

Put the pan in the freezer for 30 minutes to chill the dough well. This will help it to hold its shape while it bakes. 10 minutes before you are ready to bake, preheat the oven to 425 degrees (F.).

Bake the scones for 18 to 20 minutes. Let cool for a few minutes before serving with clotted cream or butter.

Nutrition Information per scone
   Calories:221.5 Fat: 17.5 g Net Carbs: 6.2 g Protein: 0.9 g

References used for this article include: Wikipedia, World’s Healthiest FoodsNature’s Pride and California Figs

Top photo permission from Wikipedia:  “Ficus carica0” by Kurt Stueber – link: [1], part of www.biolib.de. Licensed under CC BY-SA 3.0 via Wikimedia Commons

Eggplant is an Egg-cellent Choice

Sorry about that!  The demon eggplant made me do it.   Read on…

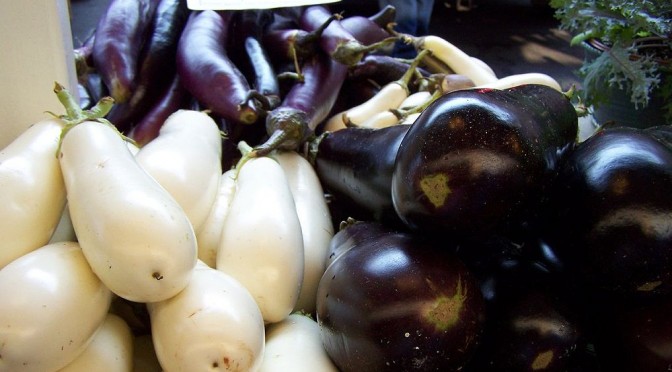
You might think that eggplant originated in the Mediterranean region since it is a very popular vegetable in Italy, but this vegetable grew wild in India. The Chinese began cultivating it in the 5th century B.C. and from there it spread to Africa some time before the Middle Ages then migrated to Italy. Because the early variety was very bitter, the plant didn’t gain a lot of popularity and some people blamed their ills on eating it, even suggesting that it caused insanity, leprosy and cancer. As the vegetable became more cultured and lost much of its bitterness thanks to modified varieties in the 18th century, it grew into favor with chefs and from them on it was all Eggplant Parmesan and Moussaka. These days, the top growers are Italy, Turkey, Egypt, China and Japan.

An early variety of the plant was white and resembled a hen or goose egg prompting the name “eggplant”. A variety of nightshade, the fruit is white, green or purple and only the fruit is eaten. Since it is a nightshade, the leaves may be toxic and can certainly affect allergies. In England and other parts of Europe, the eggplant is known as aubergine, in Asia, it is called brinjal and other common names include melongene, garden egg and guinea squash. Whatever you call it, the eggplant is a much more diversified vegetable than just the uses you might expect. It is used in all types of cooking and reading about it has certainly inspired me to want to expand the way I use it.

I planted an Asian variety in my garden two years ago and it produced about four eggplants that were very good and mild-flavored. I think I’ll try it again this year if we have enough water to actually plant a garden.  The drought affects Nevada also.

Try out this recipe on Skinny Girl that is both low carb and delicious.

Italian Style Stuffed Low Carb Eggplant

And here’s my recipe for…

Eggplant Pizza

by Rene Averett

1/2 Eggplant, peeled and sliced into 1/2″ rounds
1 Egg,
2 tablespoons Almond Flour
2 tablespoon Bread Crumbs
2 tablespoons Parmesan Cheese
1 teaspoon ground Oregano
Salt and Pepper to taste
1/4 lb. Seasoned Sausage
1/4 cup Bell Pepper, chopped
2 tablespoons Onion, chopped
1 cup Mozzarella Cheese, shredded
1/2 cup  Pasta Sauce

Peel about 2 1/2 inches of the large part of the eggplant. Cut off bottom of the eggplant, then slice off four 1/2 inch thick rounds. Lightly salt the eggplant slices.

Preheat oven to 365 degrees.  Prepare a baking pan by spraying with cooking spray or put a silicone mat or parchment paper on it.

Put the egg and salt and pepper to taste in a shallow bowl or pan and beat. Put the bread crumbs and almond flour in another bowl and add the Parmesan Cheese and oregano. Dip an eggplant slice into the egg, then dredge in the flour/bread crumbs mixture, pressing it into the eggplant. Place on the prepared pan. Repeat with each slice of eggplant.

Bake in the oven for 20 to 25 minutes until lightly browned. Raise the temperature to 385 degrees.

Meanwhile, lightly brown the sausage. Don’t overcook as it will cook a little in the oven. When the eggplant slices are done, spread two tablespoons of pasta sauce on each slice, then top with sausage, onions and peppers. Sprinkle the cheese over the top and add a dash of crushed chili peppers, if desired. Return to oven and bake another 10 to 15 minutes until the cheese is lightly toasted.

Serve with a salad to complete your meal.

Makes 4 slices.

Nutrition Info per slice
Calories: 250 Fat: 17.0 g Net Carbs: 6.6 g Protein: 15.1 g

 Learn more from my references for this blog, which include Wikipedia, The World’s Healthiest Foods and Care2.com

Top Photo Credit:  “Three Types of Eggplant” by J.E. Fee – originally posted to Flickr as Three Types of Eggplant. Licensed under CC BY 2.0 via Wikimedia Commons – 

Championing Celeriac

I only discovered celery root in the past few years and it truly is a wonderful and under-appreciated vegetable. Yes, it looks weird and has an ugly-looking skin that harbors dirt when you get it. But it cleans up nicely and it is delicious in so many ways. It’s one of three vegetables that people frequently ask me about when I check out at the grocery. The other two are Daikon radish and kohlrabi, both of which I’ll cover in this series. These vegetables seriously need a publicist!

Once again, this is an old world vegetable that dates back to the classic times. It was called selinon when it was mentioned in Homer’s “Odyssey”. Also known as celery root, knob celery and turnip root celery, this knarly-looking vegetable originated from wild celery. Unlike the usual celery with its trim green stalks, celery roots grow thicker stalks with lush green leaves and a large bulb root below the ground. The entire vegetable, excepting the string roots off the bulb, is edible, although the stalks tend to be a little tuff. When I’m fortunate enough to find a celery root bulb with the greens still attached at the grocery store, I buy it. The leaves are easily dried in a food drier or out on a sheet of waxed paper in a sunny place for a few hours.

Describing a flavor isn’t always easy, but the root portion has a mild celery flavor with a bit of nuttiness — it’s amazing how many food are described as having a nutty flavor. It is crisp when freshly cut and can be used raw in salads. But when it’s cooked, it becomes creamy and it is the closest vegetable in texture that I’ve found to the potato. I often use it as a potato substitute, particularly when making French fries. It’s great in soups, stews, stir fry dishes and other places where you would use potatoes. It can be roasted and baked.

The leaves and stalks also have a celery taste, but the stalks I’ve encountered tend to be woodier than normal celery. The leaves are nice for garnishes or adding to soups and stews or in with cooked greens. Dried, they can be added to many dishes whenever you want to add a hint of celery to flavor.

Cleaning and Preparing

I admit it’s a bit of a challenge to clean and trim the celery root. Use warm running water and a scrub brush to clean up the skin as much as possible. There are many little cracks in the root’s surface where dirt can hide. Once clean, dry it off, then cut the knobs off with a chef’s knife or a sharp paring knife.

Peel the outer skin off and dig in where the exterior skin may have made a crevice in the vegetable. It’s like a potato eye, just take the paring knife and cut in under it to remove. Then cut the root into cubes or planks, depending on how you want to use it. The bigger roots can be difficult to cut through and it may take a lot of muscle to get the knife through the whole root.

Once you’ve trimmed the root, parboil it in a pan of boiling water with a splash of lemon juice for about 3 minutes. This will help prevent browning. If you aren’t going to use the cubes or planks right away, then put in freezer bags, press out as much air as possible, label with the date and put in the freezer. If you’re using it soon, just put in a plastic bag until ready to use.

Celery root cleaned and cut into quarters to bake.

If you want to bake the celery root, you can just clean the exterior as much as possible, poke with knife a few times, rub a little oil and seasoning on it, then put in the oven at 375 degrees (F.) to bake for about 45 minutes to an hour. This will vary with the size of the celery root. Once done, peel off the outside skin and serve the creamy insides like you would a baked potato.  It’s great with butter, sour cream and bacon bits.

Baked celery root is creamy and delicious with a texture similar to a baked potato.


Nutrition Info for 1 cup Celery root
   Calories: 66 Fat: 0.5 Net Carbs: 11.9 g Protein: 2.3 g

Recipes

I use celery root frequently as a replacement for potatoes and just as a delicious vegetable on its own. Here are a couple of recipes from this site that use celery root.

Quick Roasted Celery Root (mid-way down the page)
Warming Beef Stew for Fall
Corned Beef Hash
Celery Root Fries (near the bottom of the page)

My references for this article include the following web sites: Wikipedia, Eat the Seasons and The Vegetable World’s Ugly Duckling